Tegaur Kiosk (Legacy)
We no longer support Hardware related issues with the I&E and Tegaur Kiosks
To add an unattended kiosk to your Fast-Weigh subscription, contact us at 865-219-2980 or [email protected].
Pre-Installation Considerations:
Waterproofing:
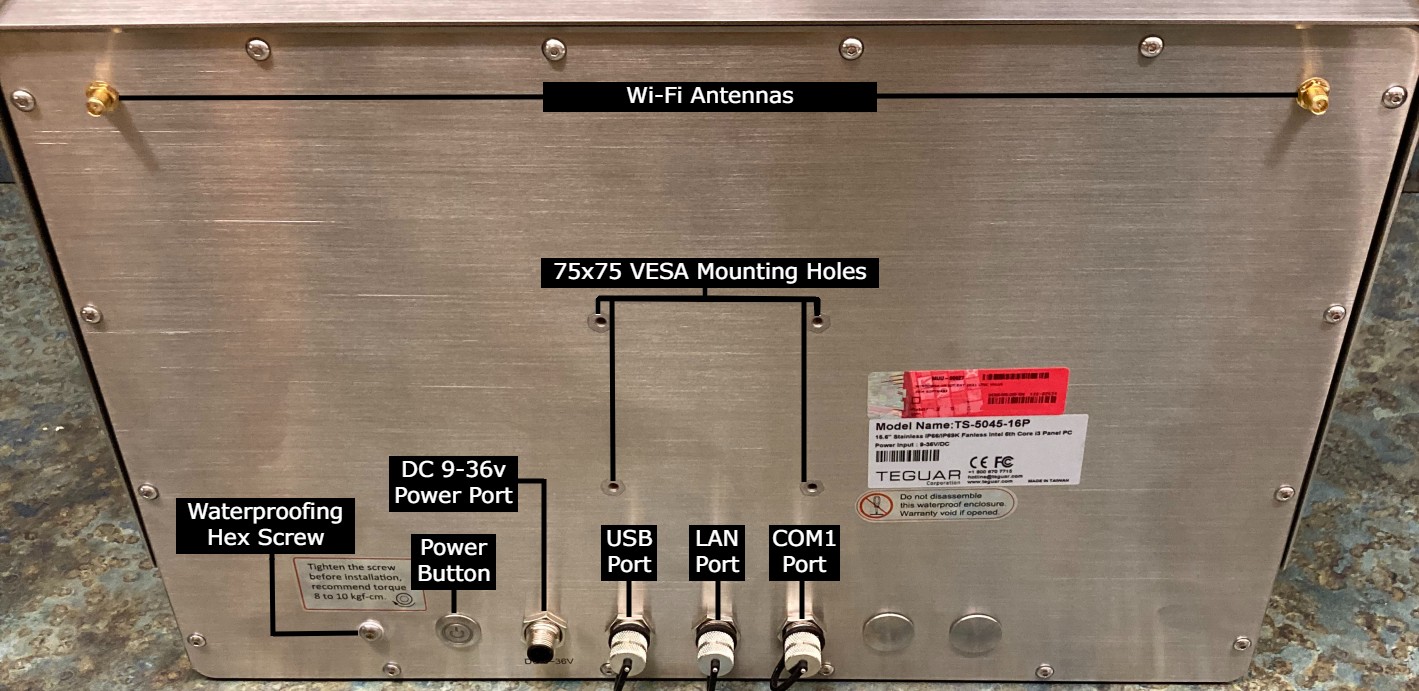
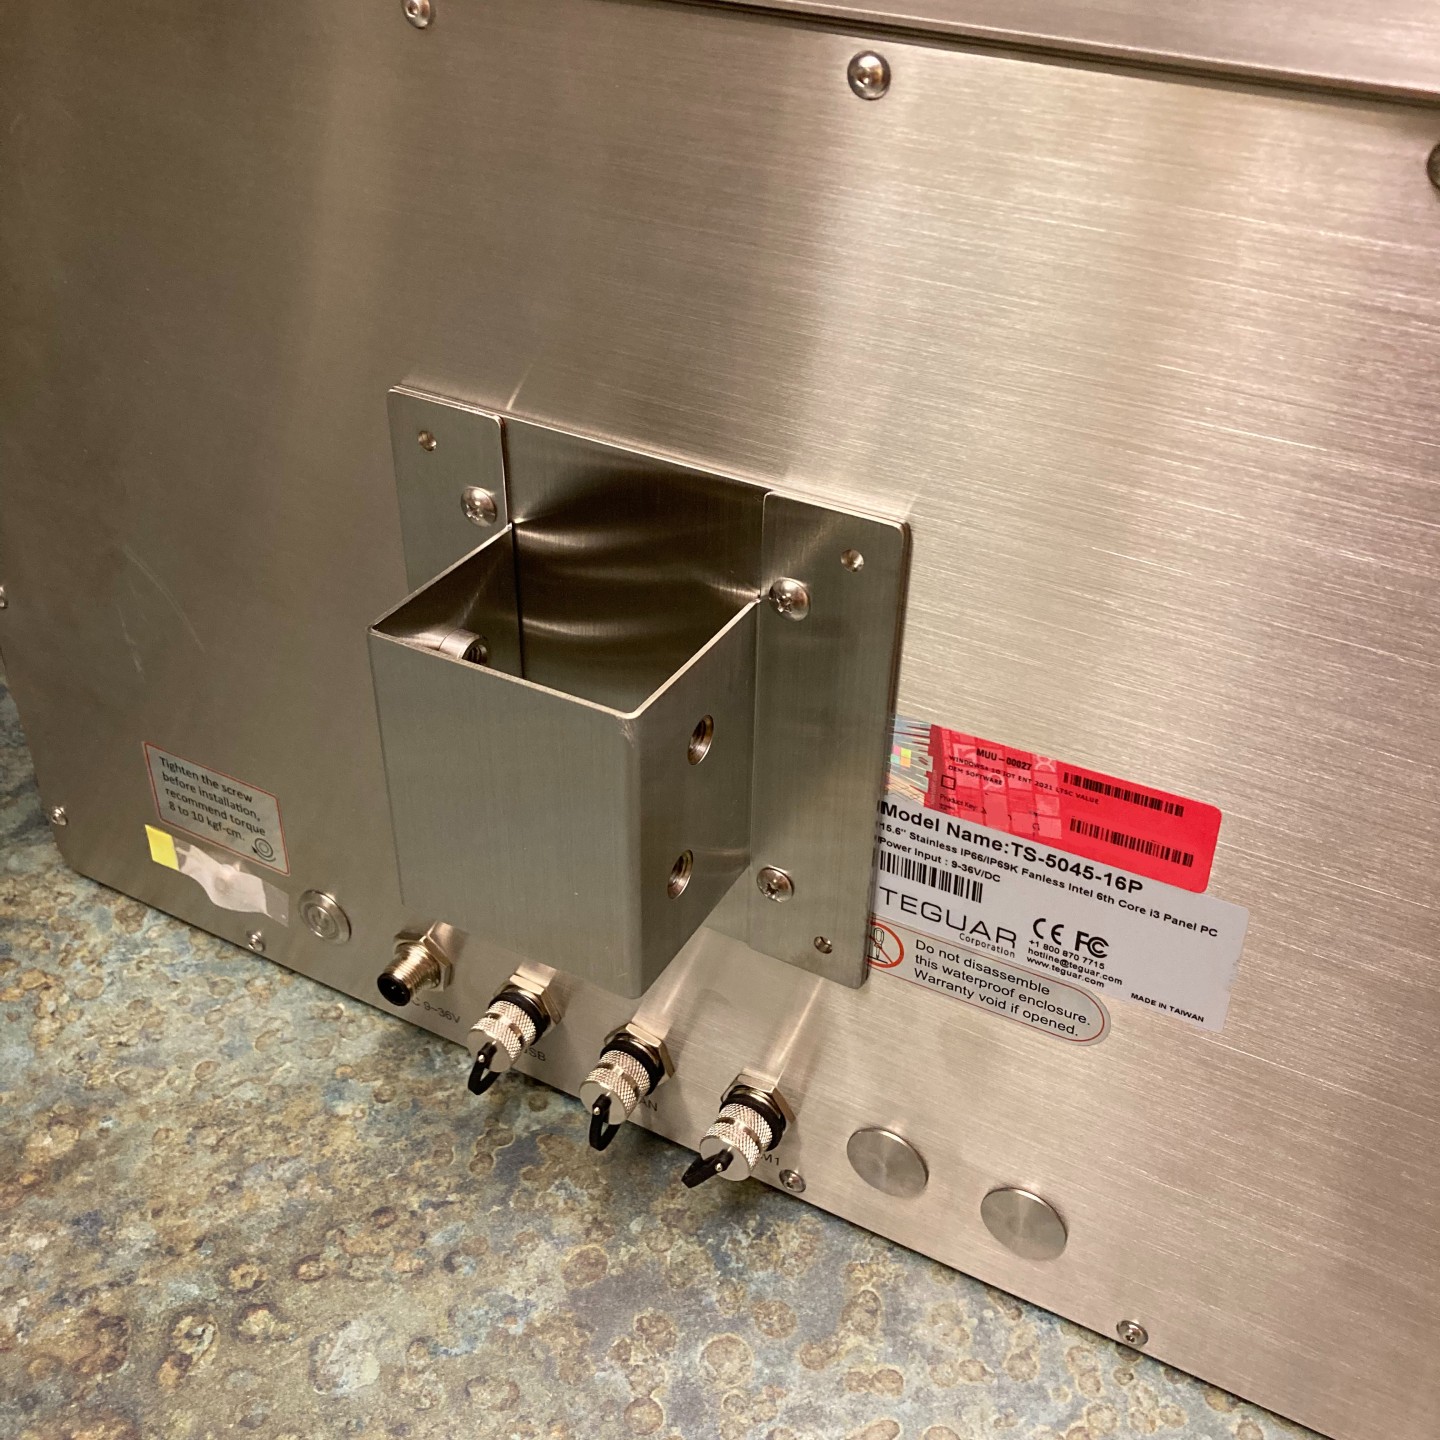
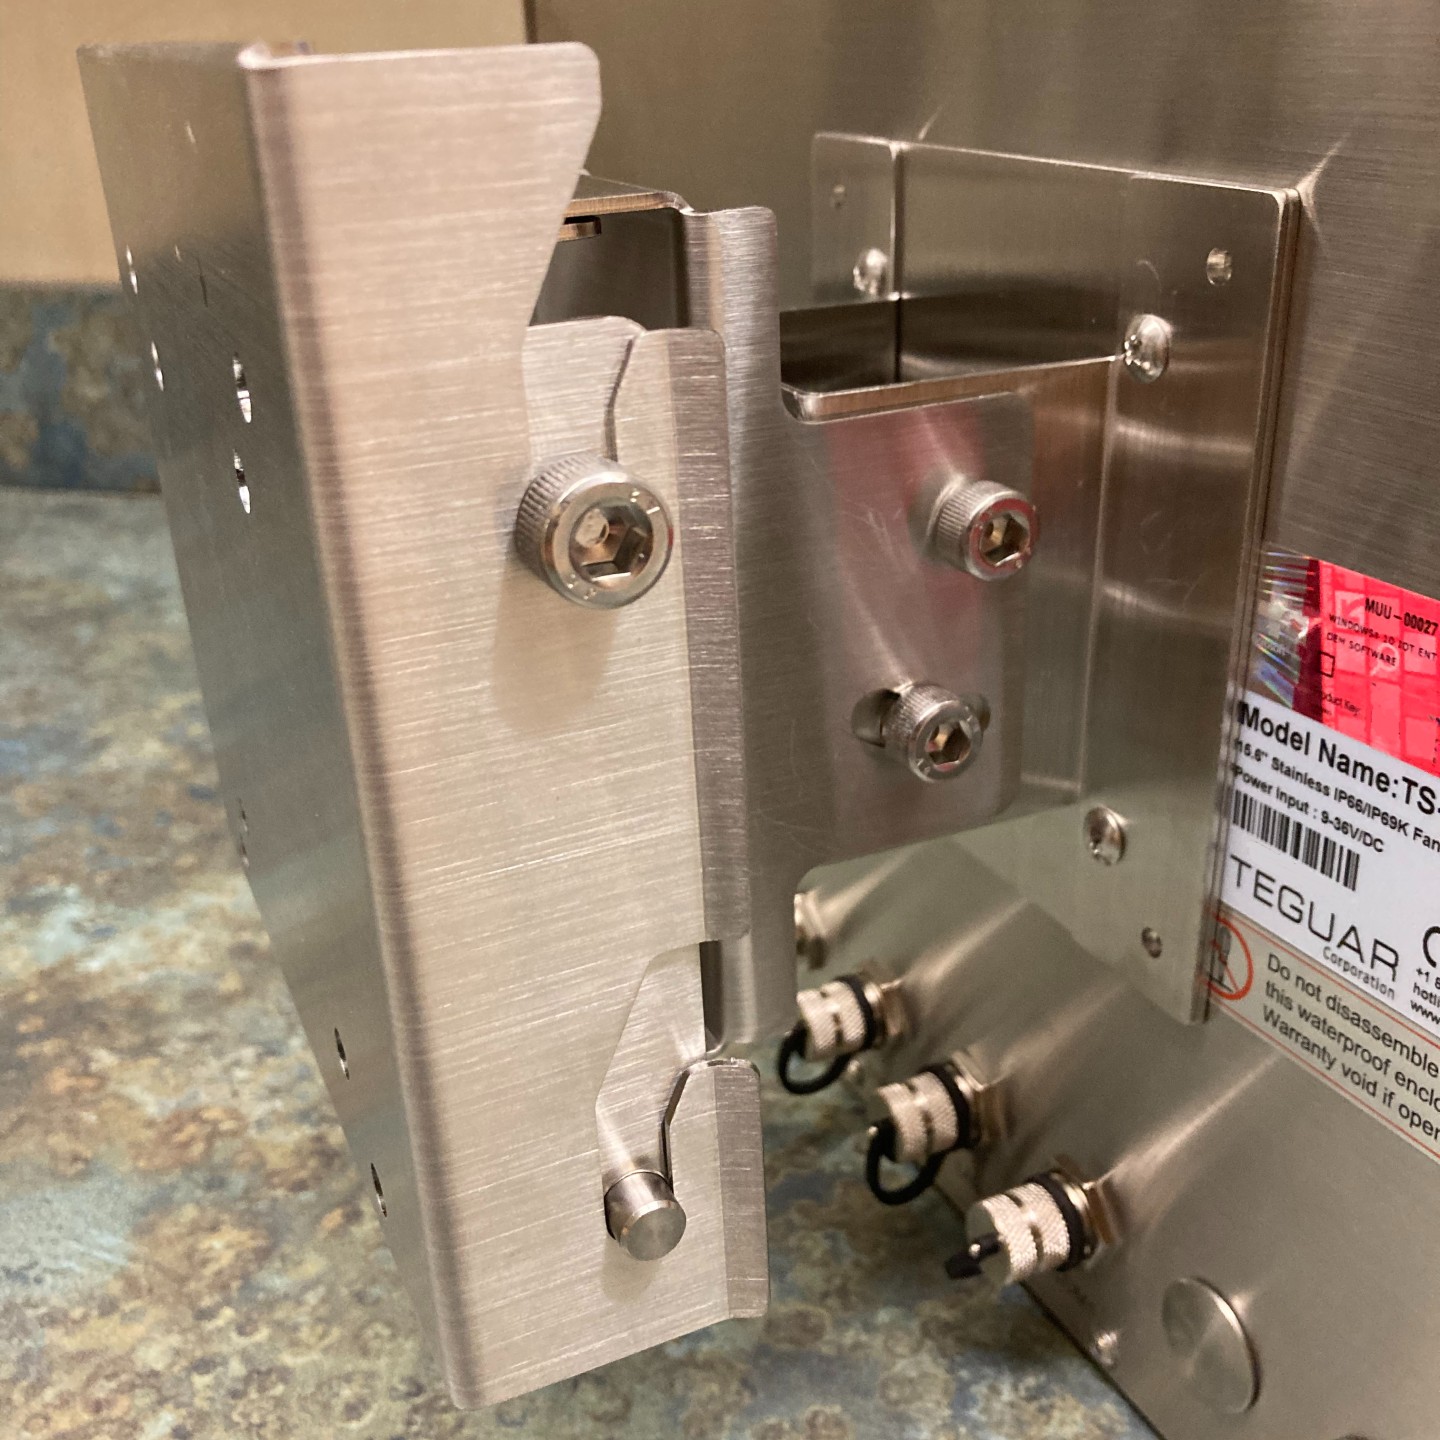
WARNING: The kiosk is not fully waterproof until the small hex screw on the back of the device is tightened. Recomended torque is 8-10kgf-cm.
This small hex screw is left loose during shipping to prevent pressure changes from damaging the screen.
WARNING: Any threaded connection (DC 9-36v, LAN, USB, COM1, and Wi-FI Antennas) must be fully threaded and properly secured. Failure to do so may result in water damage to the unit.
Power Requirements:
DO NOT power this Kiosk with anything other than the included power adapter plugged into a standard 120v power outlet.
Mounting Options:
Direct VESA Mounting: This kiosk is built with standard 75x75 VESA mounting holes. Ideal for mounting to any adjustable VESA 75x75 compatible mounting solution that is rated for up to 26lbs (32lbs if using the Wall Mounting Adapter). This mounting style omits the Wall Mounting Adapter, keep in mind that tilt or pan adjustment will need to be made by the mounting solution.
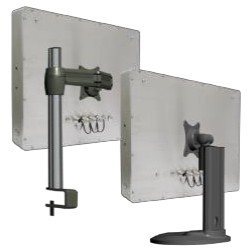
Wall Mounting Adapter: This adapter has 3 main components: Kiosk Mounting Plate (75x75 VESA), Wall Mounting Plate (75x75 VESA/100x100 VESA), and Tilt and Pan Adjuster. It can be used to mount to any flat and vertical surface as well as any 75x75 VESA or 100x100 VESA compatible mounting solution (must be rated for up to 32lbs).
Network Connectivity Options:
If you are unsure about your connectivity options, contact your IT Department or Network Administrator.
Wi-Fi:
Requires a stable Wi-Fi connection at the installation location.
You can extend the range of existing Wi-Fi networks by installing an Access Point (AP), preferably mounted on the exterior of the Scale House pointed at the Kiosk.
LAN (*preferred*):
Requires a wired connection to be available at the location the Kiosk will be installed.
A wired network connection may require trenching ethernet cable and/or running cables behind walls/ceilings. Be sure to use an outdoor-rated ethernet cable.
Scale Connectivity Options:
Our system can read data from your weight indicator using two methods:
RS-232 Serial to USB Adapter:
RS-232 serial output from the weight indicator, which is then converted to USB using a prolific Serial to USB converter. Windows 10/11 cannot read serial or USB data directly.
We recommend the Insignia Brand Serial to USB adapter from Best Buy. (The Keyspan brand Serial to USB adapter cannot be used to send weights to the Fast-Weigh desktop application.)
Serial over IP:
Broadcasts data from the weight indicator over an IP network. Requires a wired connection near the weight indicator. The weigh indicator connects via Serial.
We recommend the Moxa N-Port 5110.
Optional Accessories:
Outdoor Printers
RFID Cards
Traffic Lights
LPR Cameras
CCTV Cameras
Installation:
Packing List:
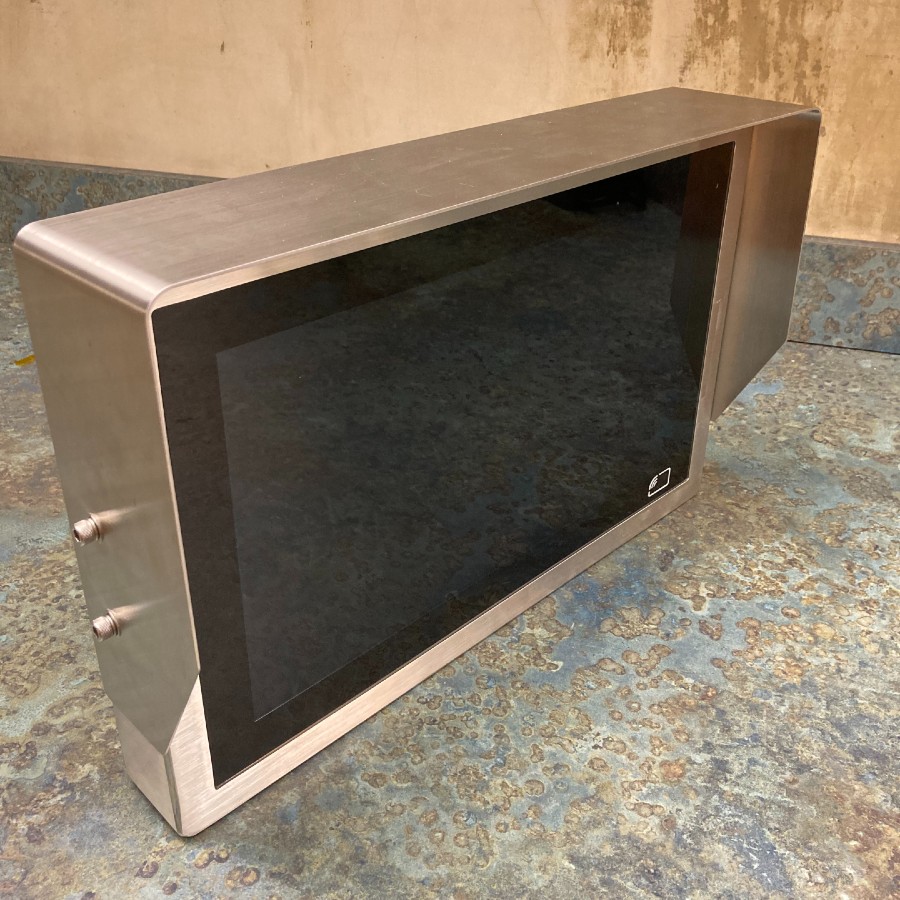
Ruggedized All-in-one Kiosk PC:
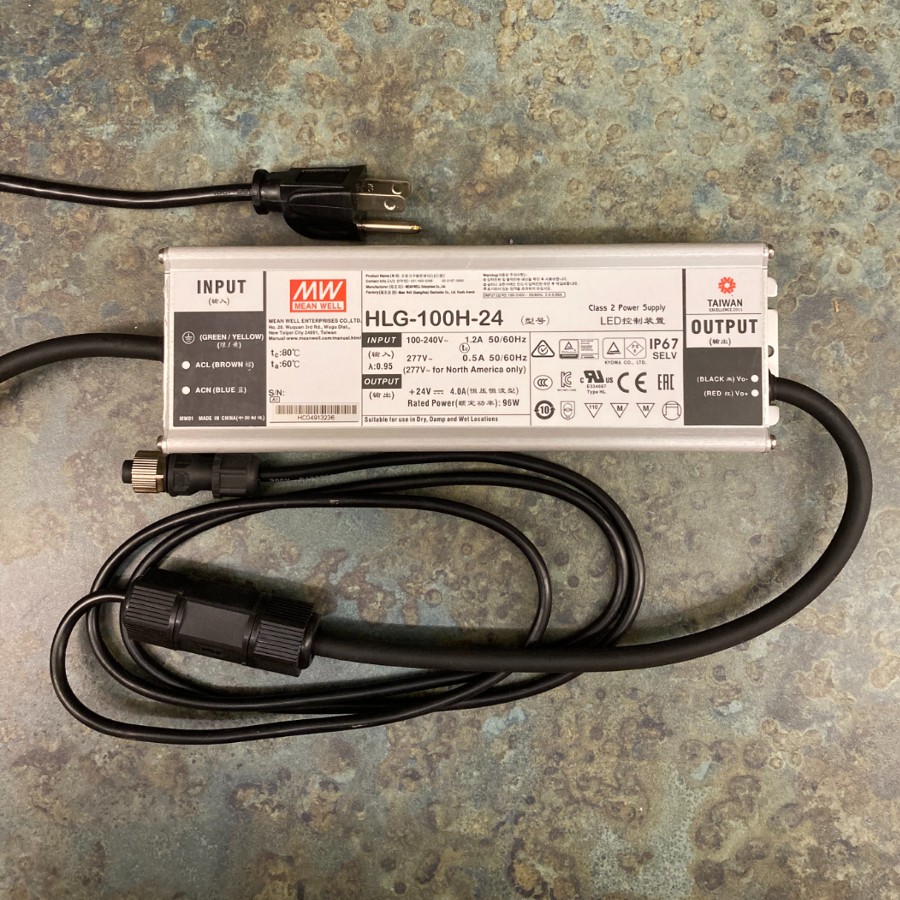
Power Supply:
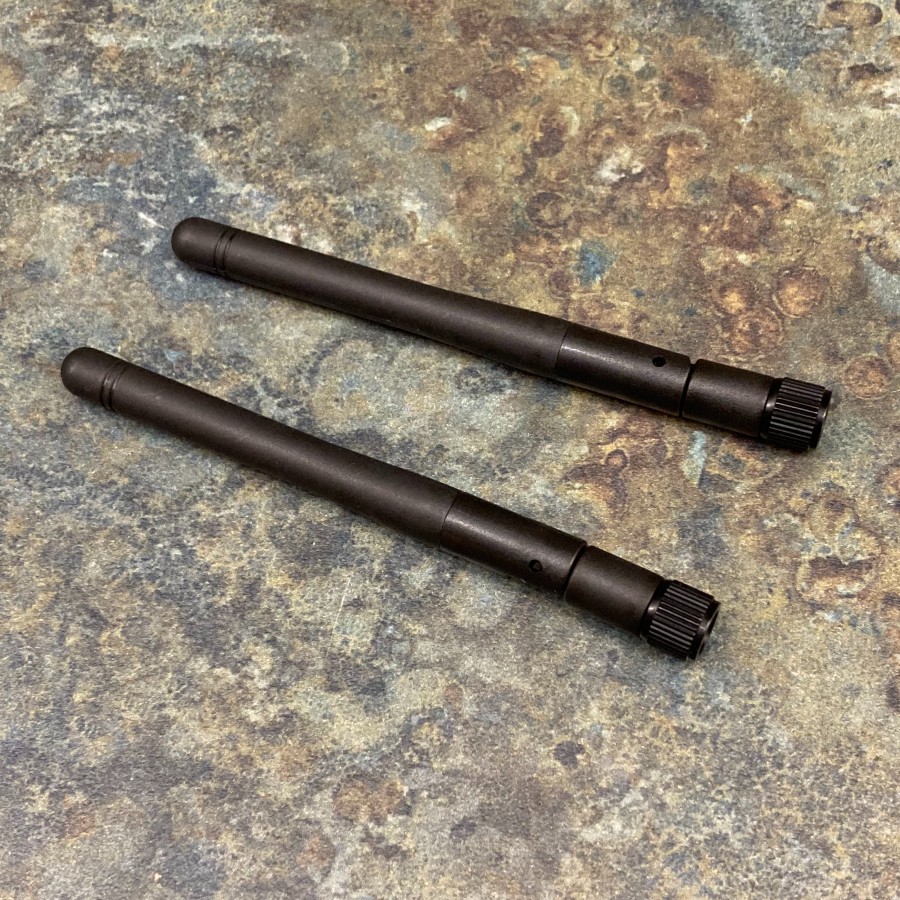
2 x Wi-Fi Antennas:
Kiosk LAN Port (M12 8-pin) to Ethernet Cable (w/ Ethernet Keystone Jack):

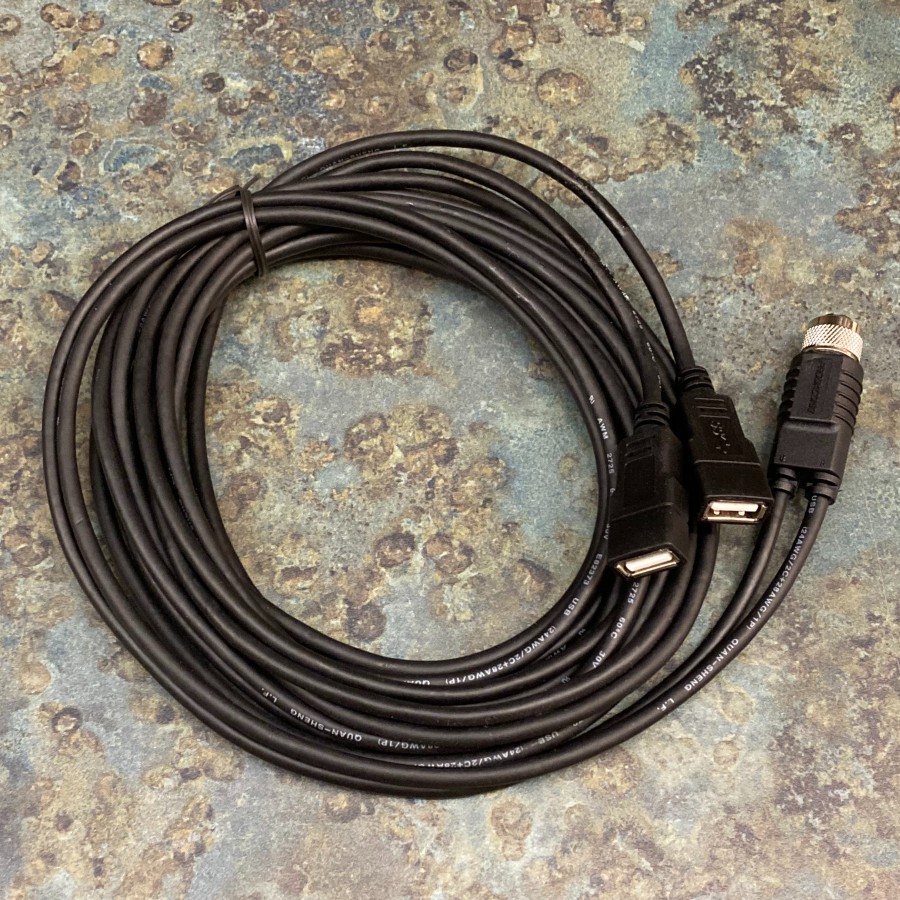
Kiosk USB Port (M12 8-pin) to Dual USB Port Cable:
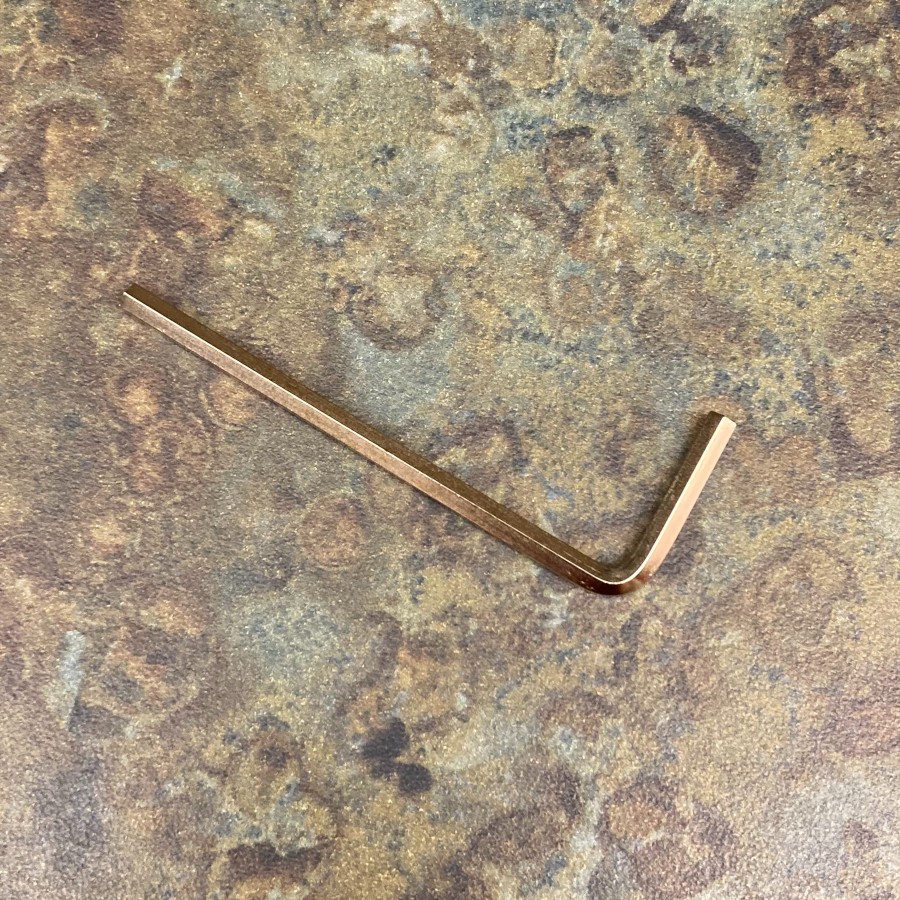
Hex Key:
Confirming Functionality:
Remove the Kiosk from the box and confirm the package contained everything listed above.
Plug the Power Supply into a standard 120v power socket and connect it to the port labeled "DC 9-36v" on the back of the Kiosk.
WARNING: Do not power this Kiosk with anything other than the included power adapter plugged into a Standard 120v power outlet.
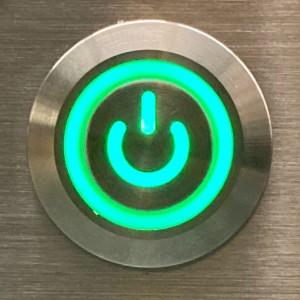
Press the Power Button located on the back of the Kiosk, It will light up green when powered on.
ON:
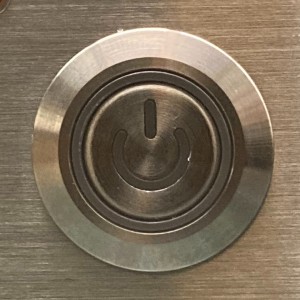
OFF:
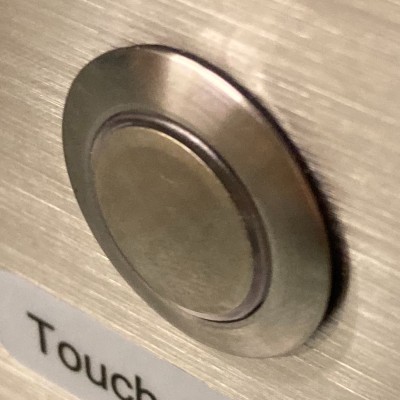
Some versions of this kiosk have a small silver button located on the side. This button must be depressed when powered on for the touchscreen to work.
Button Depressed (touchscreen on):

Button not Depressed (touchscreen off):
Confirm you can log into and control the Kiosk.
Power off the kiosk before installation.
Mounting the Kiosk:
WARNING: The kiosk is not fully waterproof until the small hex screw on the back of the device is tightened. Recommended torque is 8-10kgf-cm.
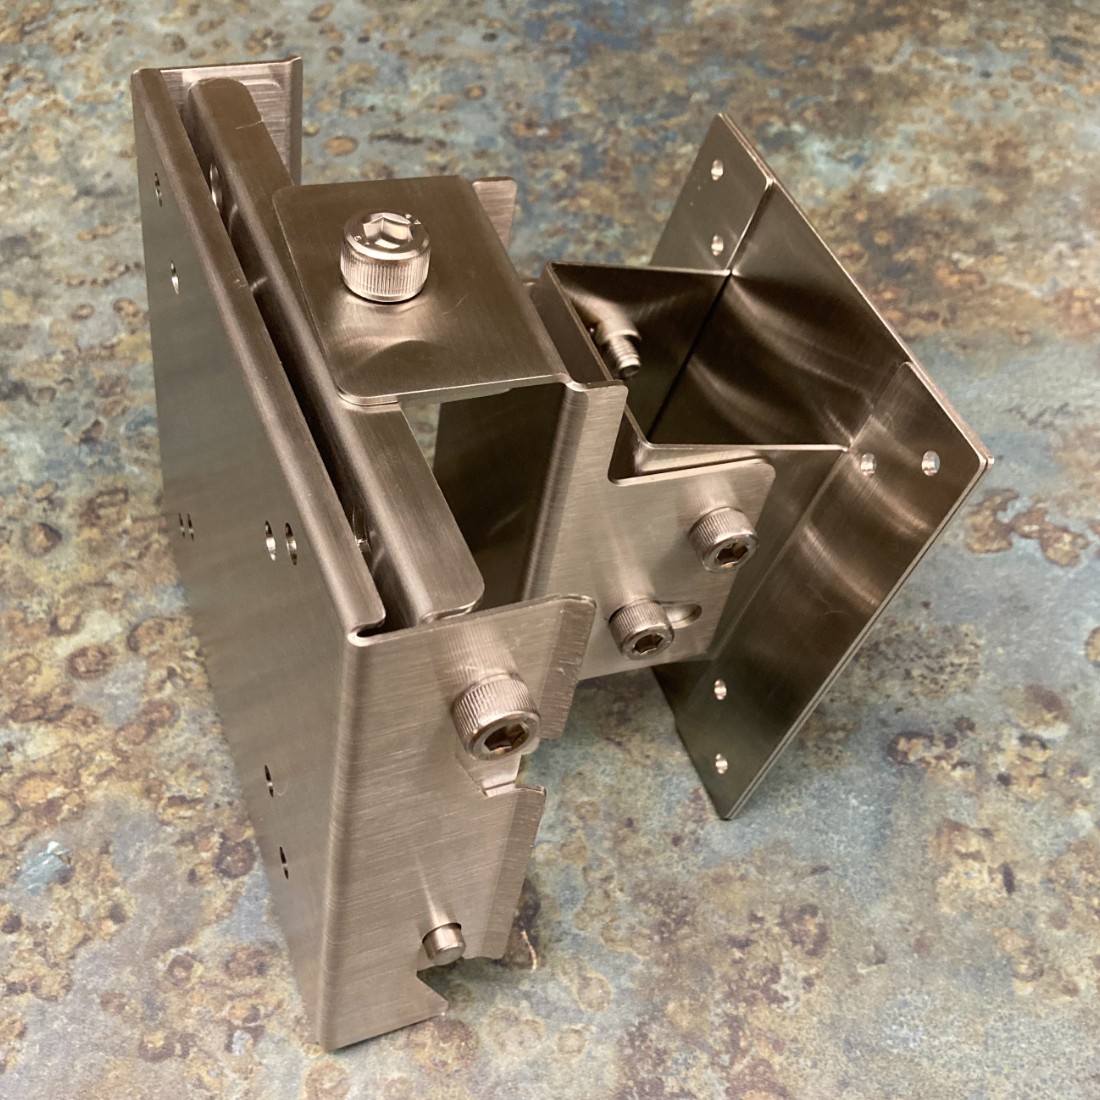
Wall Mounting Adapter:
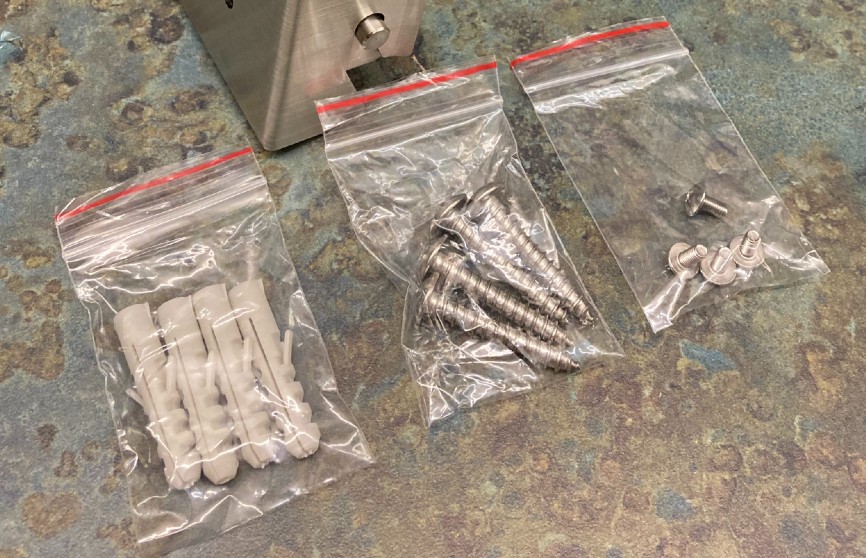
Unpackage the wall mounting adapter and confirm it contains the wall mounting adapter, 4 small screws, 4 large screws, and 4 anchors:
Disassemble the wall mount adapter in the 3 parts:
Kiosk Mounting Plate (75x75 VESA):
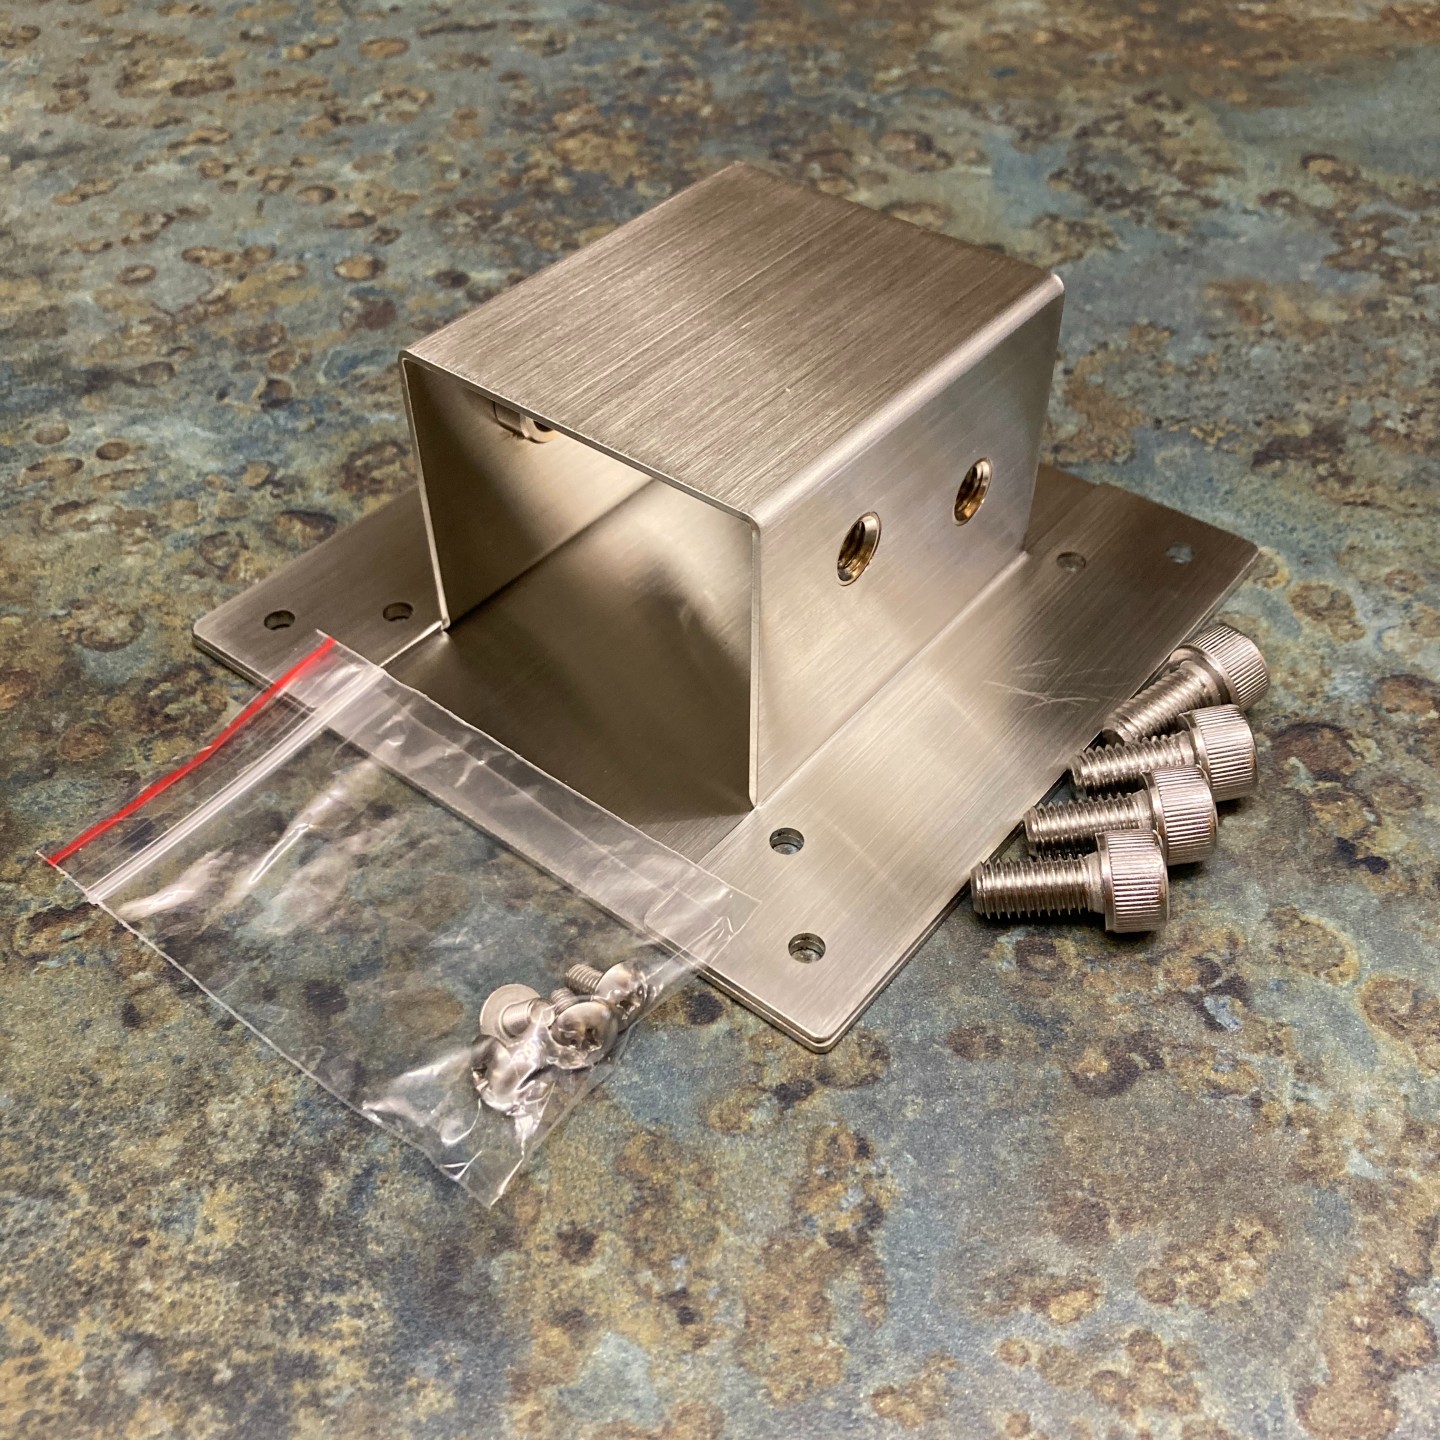
Wall Mounting Plate (75x75 VESA/100x100 VESA):

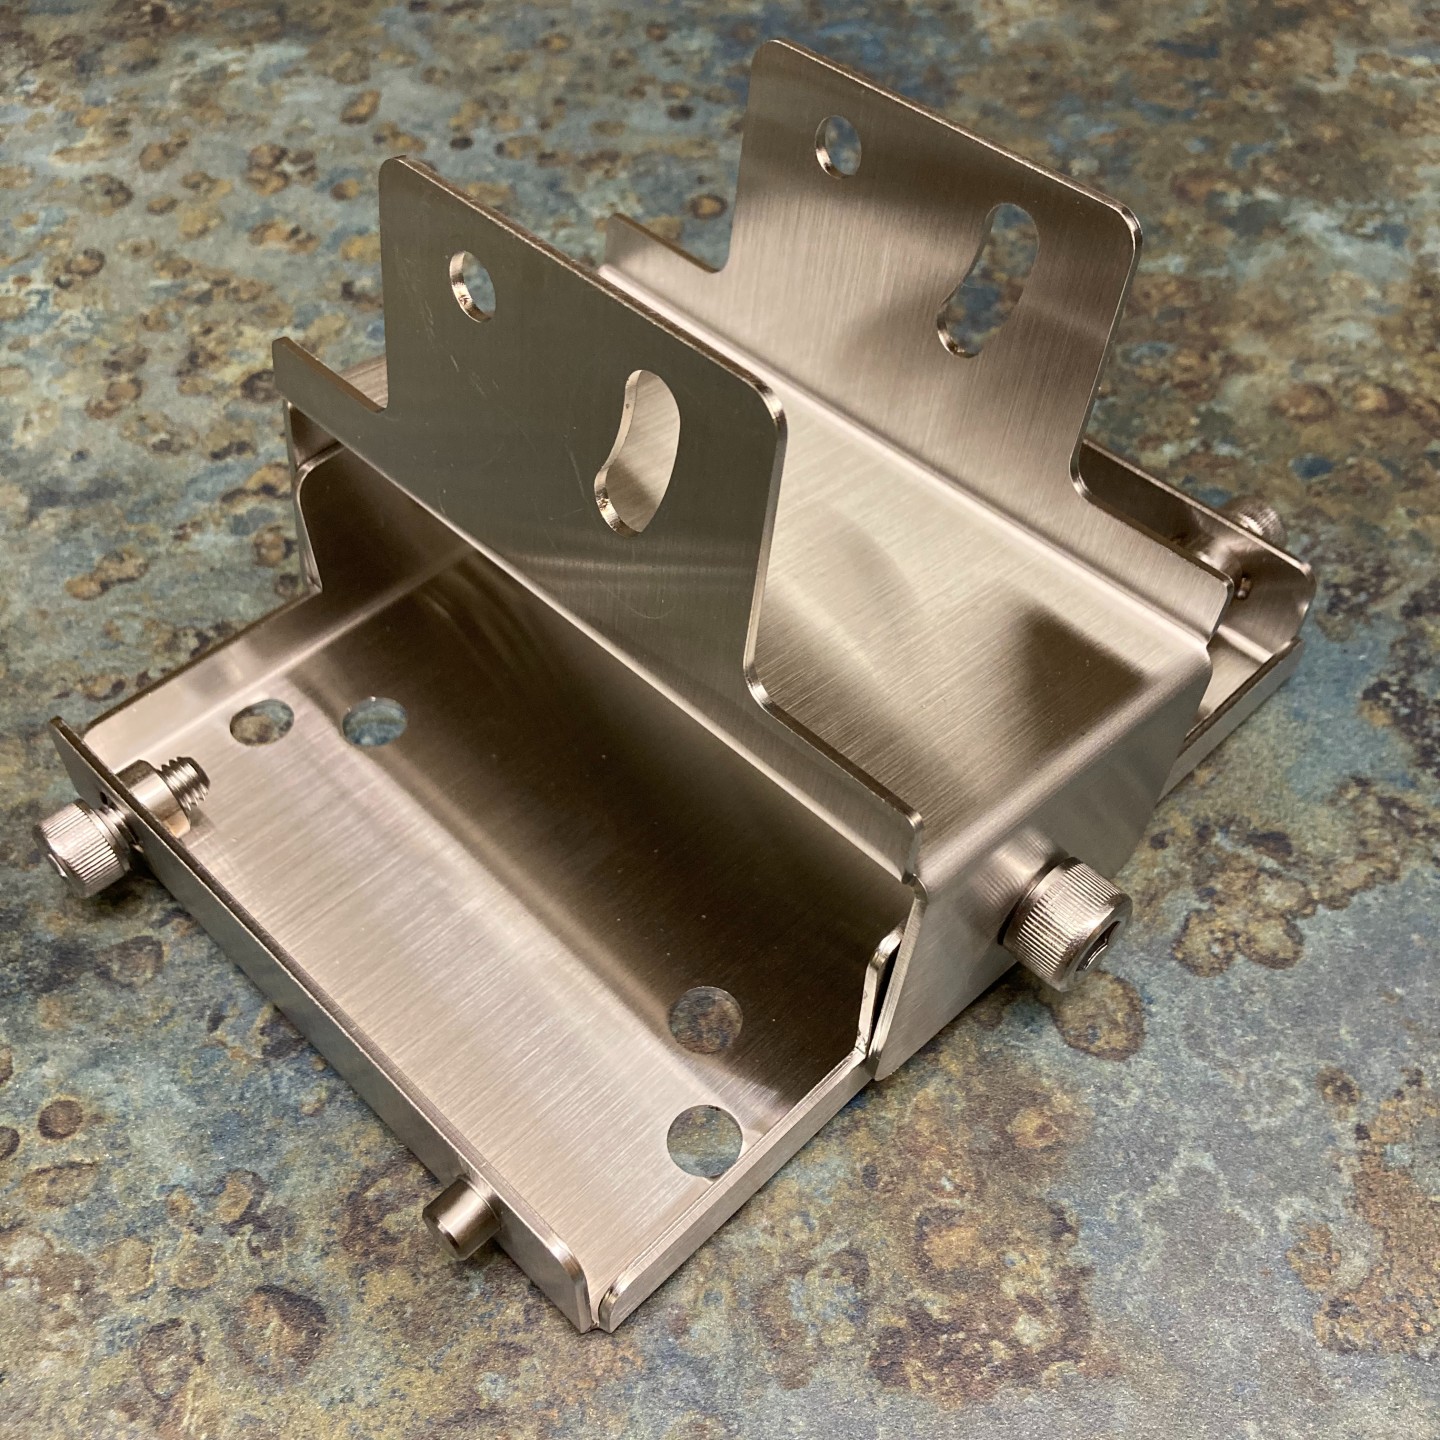
Tilt and Pan Adjuster:
Mount the kiosk mounting plate to the back of the kiosk:
Mount the Wall mounting plate to a wall or to a 75x75/100x100 VESA compatible mounting solution (must be rated for up to 32lbs)
Due to a number of variables (Average Truck Height, Use Case, Optional Accessories) the exact position of mounting will be unique to the location.
Attach the tilt and pan adjuster to the kiosk mounting plate and hand tighten the 4 thumb screws (Do not torque these screws until fully installed)
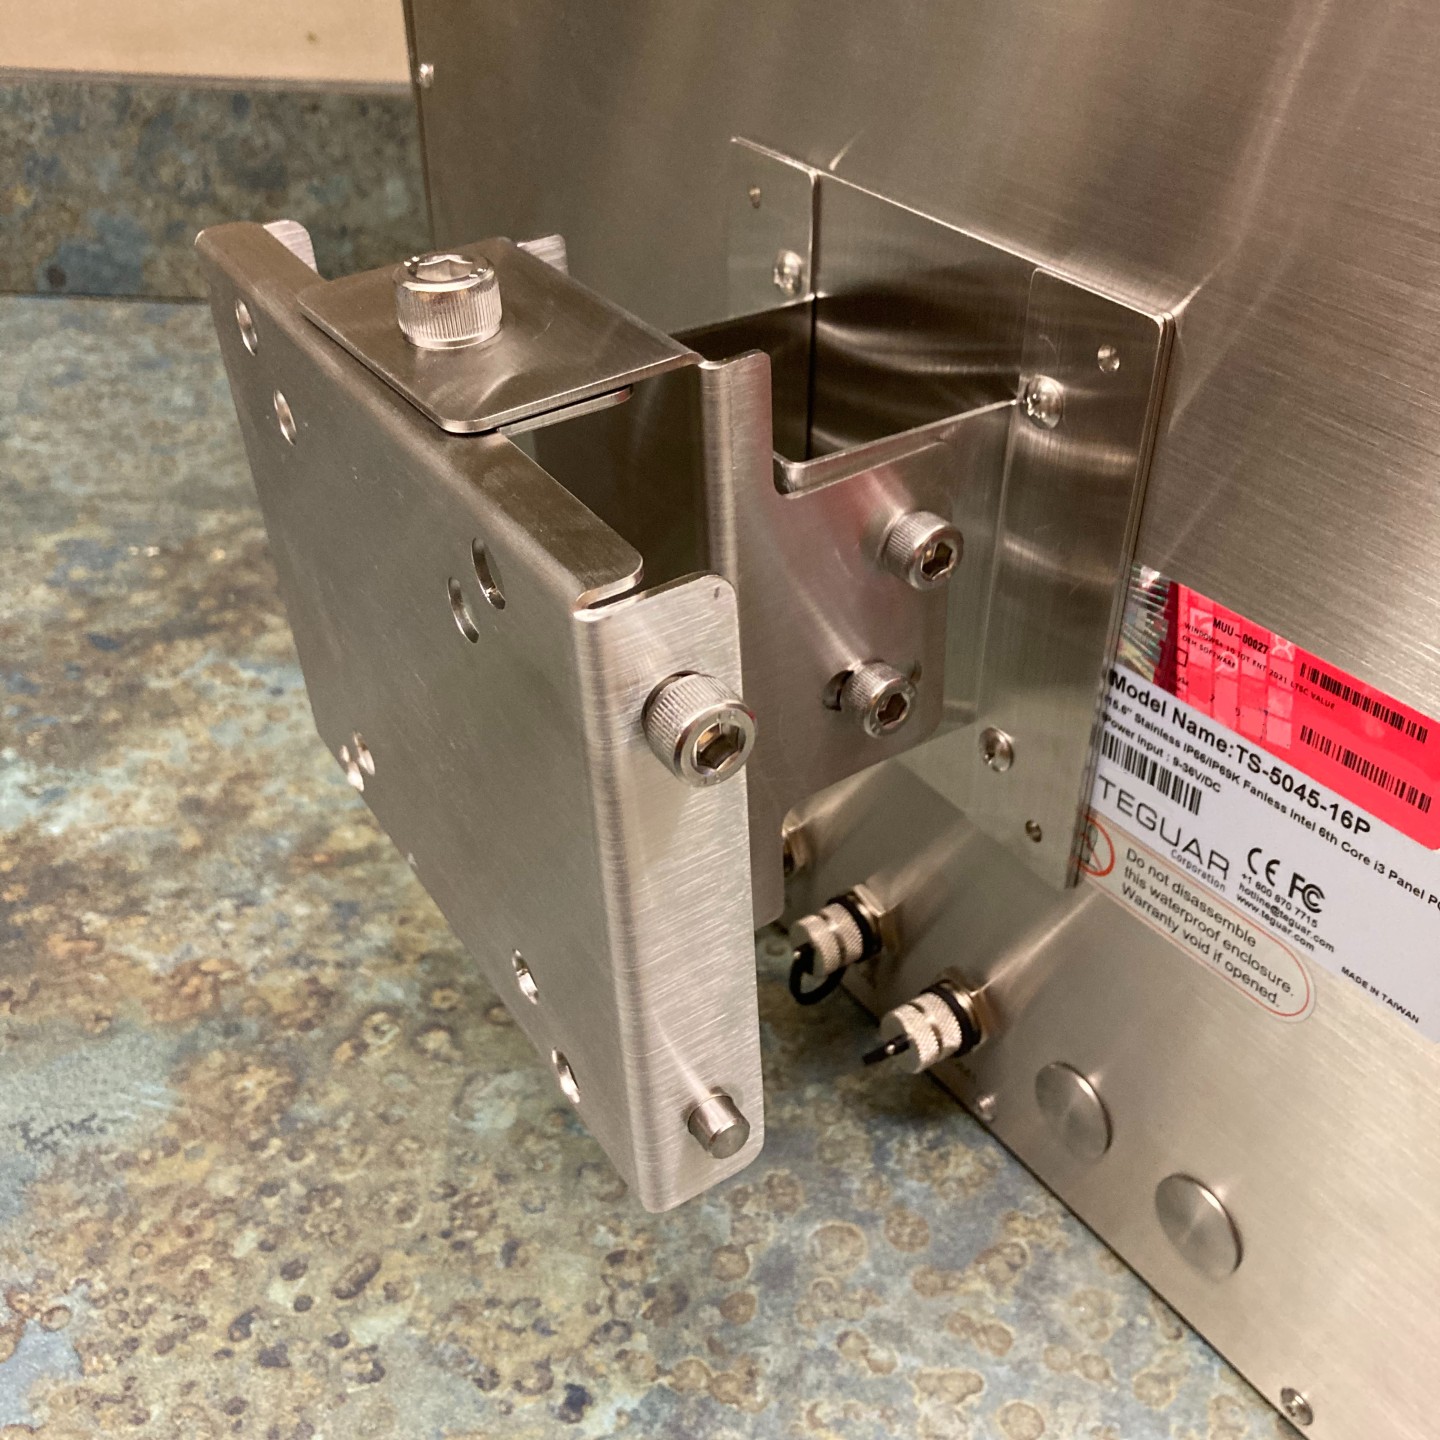
Hang the Kiosk on the wall mounting plate and hand tighten the 2 thumb screws (The wall mounting plate is not mounted to a wall in this photo for better visibility):
After finding the ideal tilt and pan settings, torque all 6 thumb screws.
WARNING: The kiosk is not waterproof until the power has been connected, do not leave this unit mounted without finishing the next section "Connecting Power"
Connecting Power:
Plug the power supply into a standard 120v power socket and connect it to the port labeled "DC 9-36v" on the back of the Kiosk.
WARNING: Do not power this Kiosk with anything other than the included power adapter plugged into a Standard 120v power outlet.
WARNING: The kiosk is not fully waterproof unless this connection is fully threaded and properly secured.
Press the Power Button located on the back of the Kiosk, It will light up green when powered on.
ON:
OFF:
Some versions of this kiosk have a small silver button located on the side. This button must be depressed when powered on for the touchscreen to work.
Button Depressed (touchscreen on):
Button not Depressed (touchscreen off):
Confirm you can log into and control the kiosk.
Connecting to the Internet:
If you are unsure about any of this information, contact your IT Department or Network Administrator.
Screw the two included Wi-Fi antennas onto the SMA antenna connector located on the back of the unit
Angle the antenna upwards for better reception
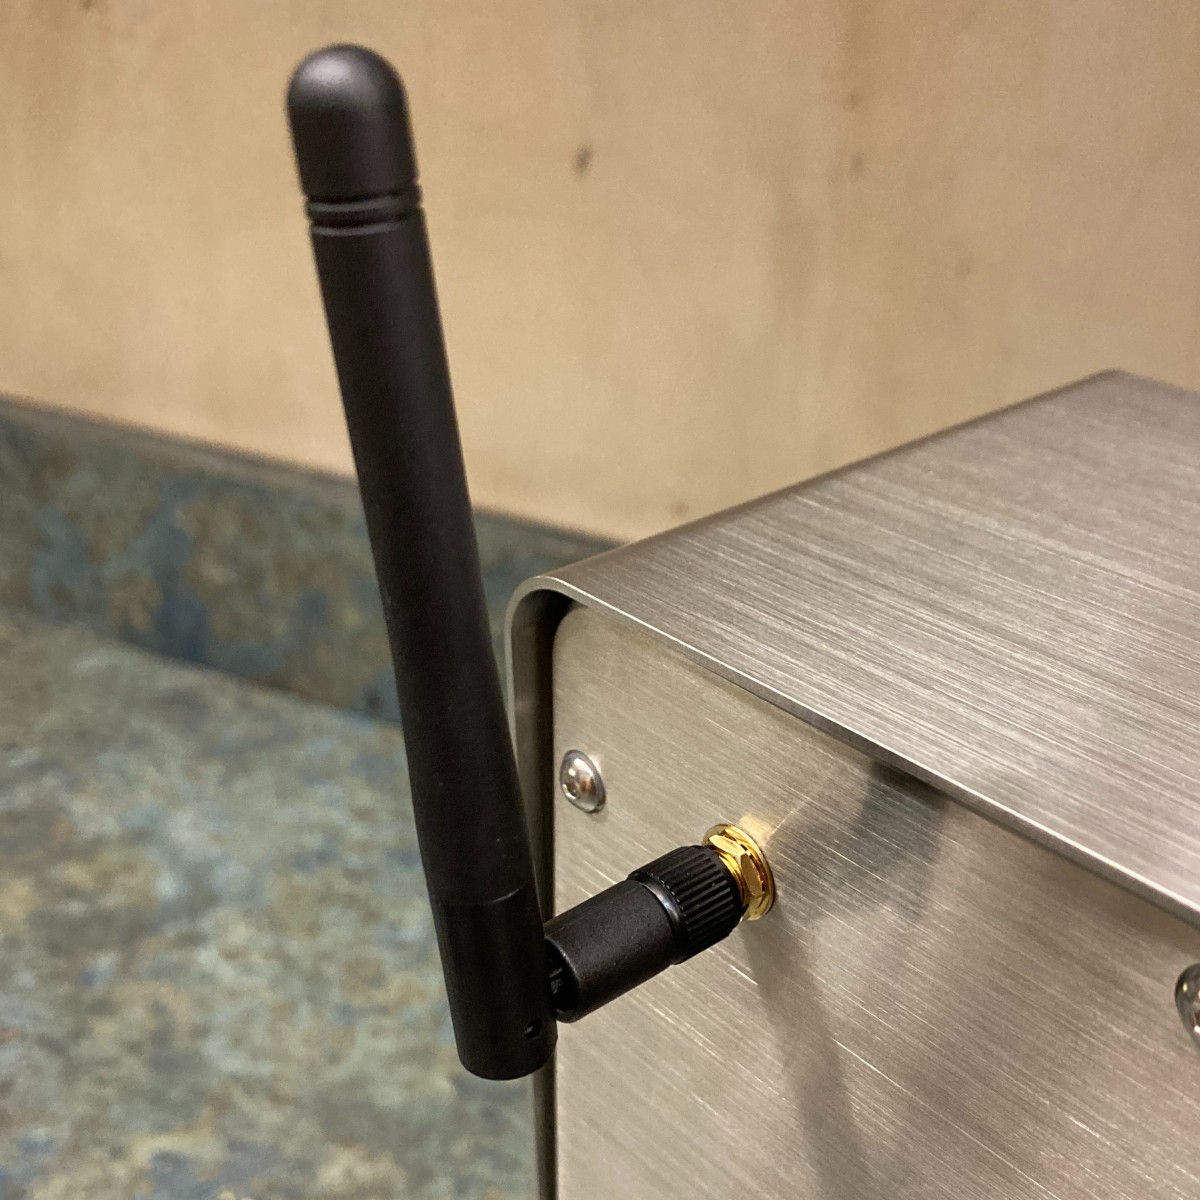
WARNING: The kiosk is not fully waterproof unless this connection is fully threaded and properly secured. This applies to both kiosks connected to Wi-Fi and LAN.
For Wi-Fi: Connect to the Wi-Fi network in Windows
If you have both a 2.4ghz and 5ghz version of your Wi-Fi connection available, be sure to connect to the 2.4ghz version. 5ghz Wi-Fi is faster but has a smaller range and does not penetrate solid objects as well as 2.4ghz.
You can extend the range of existing Wi-Fi networks by installing an Access Point (AP), preferably mounted on the exterior of the Scale House pointed at the Kiosk.
For LAN:
Connect the "Kiosk LAN Port (M12 8-pin) to Ethernet Port Cable" in the port label "LAN" on the back of the Kiosk
Plug your Ethernet connection into the Ethernet port
WARNING: The kiosk is not fully waterproof unless this connection is fully threaded and properly secured. If you are not using a LAN connection make sure the cap is secure.
Confirm the Internet is connected:
Open a web browser on the kiosk and go to Speedtest.net
Connecting to the Scale:
See Connecting a Scale to the App
Contact your scale manufacturer for more information about your scale indicator.

Last updated