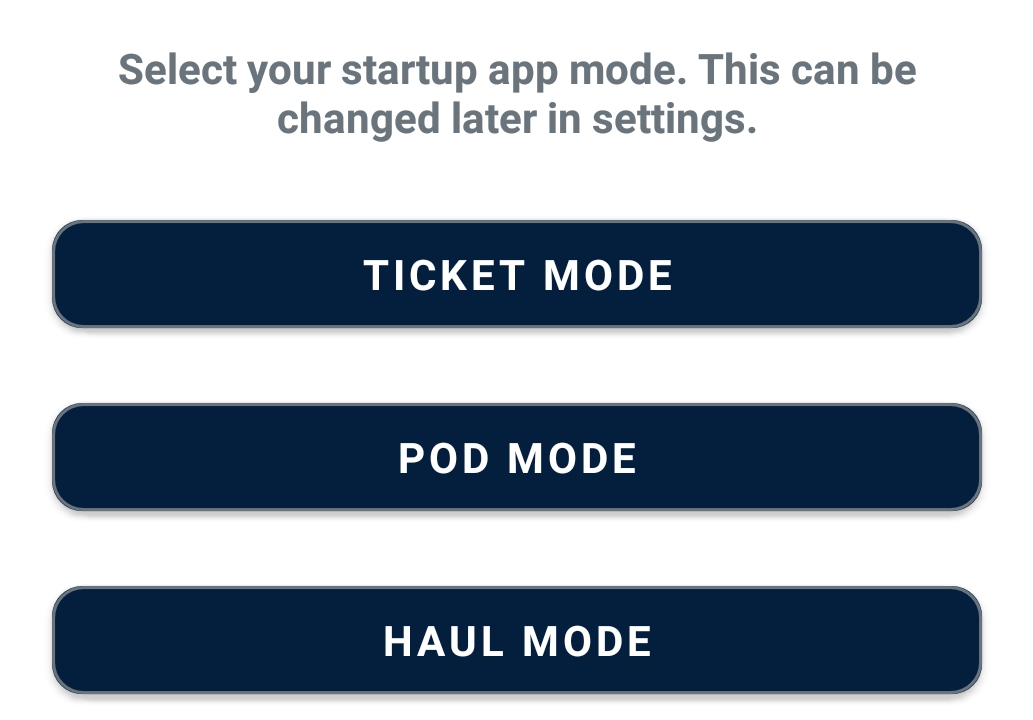
When you Open the app for the first time, you will be prompted to select Ticket mode, POD mode, or Haul mode. For Mobile Ticketing, select the Ticketing mode.
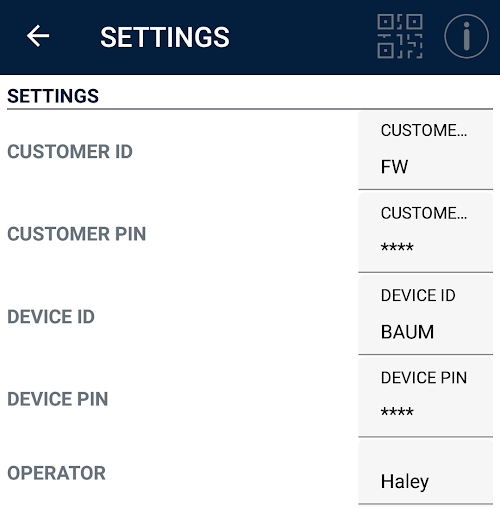
Customer ID and Customer PIN - To get your Customer ID and PIN, contact us at support@tacinsight.com or call 865-219-2980 during business hours.
Device ID and PIN - These can be found on the Web Portal by going to Devices > Mobile.
Operator Name - The name of the person operating the App
Click on the back arrow to go to the main Dispatching screen.
Sync the app to ensure all of your Settings have been entered correctly.
Click on the settings button to finish configuring the app.
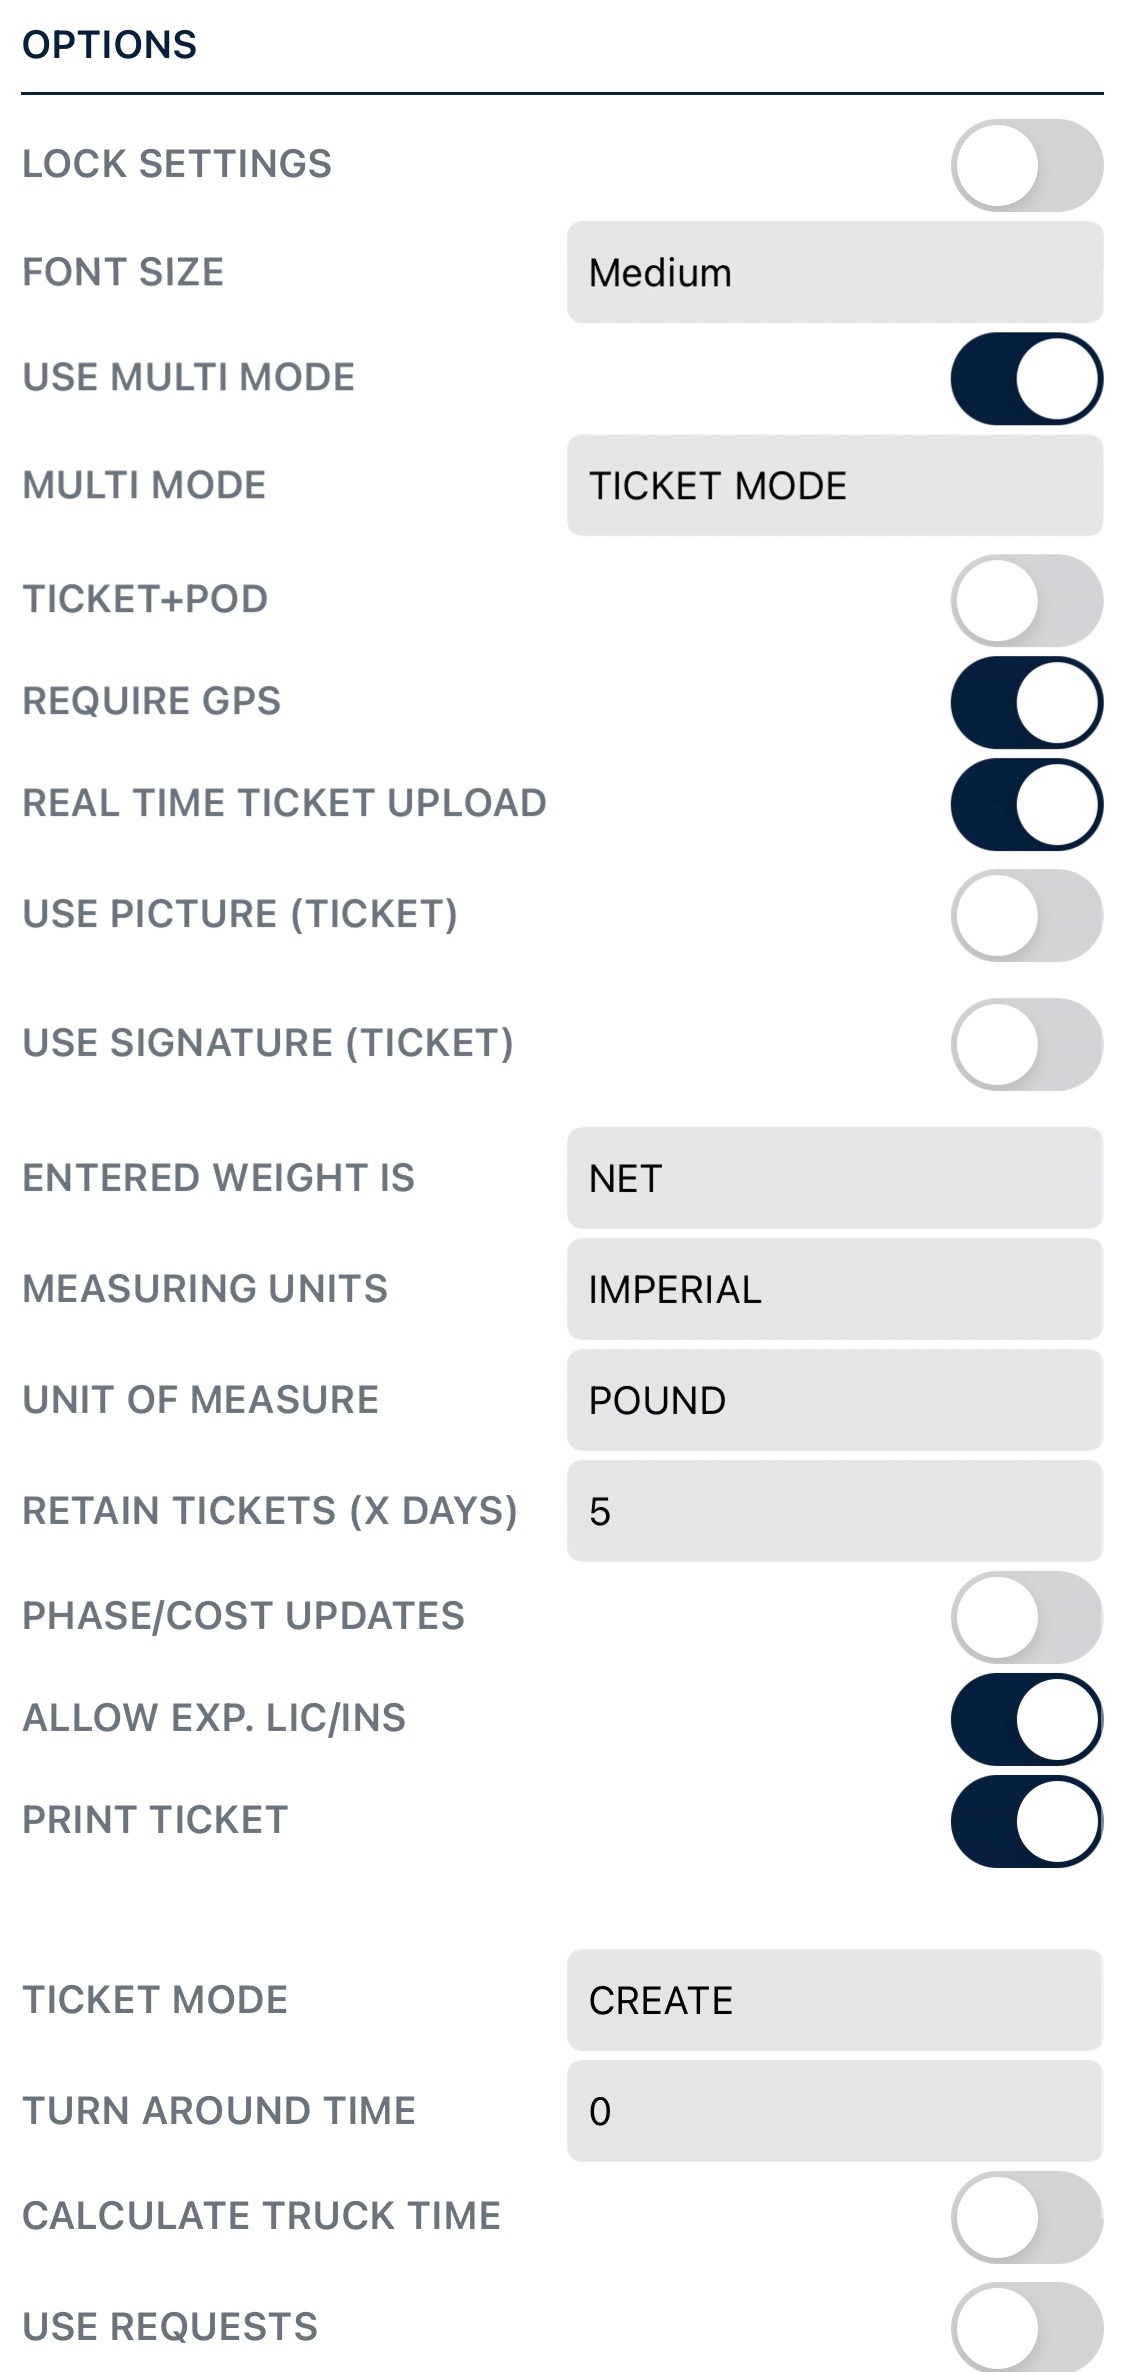
Lock Settings - Turn this on to lock the Mobile App settings behind a password (this will be the Device Pin)
Font Size - You can set a smaller or larger font size for the app here.
Use Multi Mode - You can turn this on to allow switching between the Ticket, POD, and Dispatching modes.
Ticket+POD - Turn this on to add a quick-switch button between Ticketing and POD modes.
Require GPS - Require GPS to be turned on to record the location of the ticket.
Real Time Ticket Upload - Turn on to upload all new Tickets to the Web Portal as they are created.
Note: If you are ticketing without an internet connection and syncing up later, make sure that this setting is off.
Use Picture (Ticket) - Turn on to allow capturing a photo when creating a ticket.
Use Signature - Turn on to use a digital signature when creating a ticket.
Entered Weight Is - Set to capture a Net weight or Gross weight when entering the ticket.
Measuring Units - Set the type of units used (imperial or metric).
Unit of Measure - Set the unit used
Retain Ticket for (Days) - How long the system locally saves ticket data
We recommend not exceeding 7 days, since more data can impact the speed of the system by using excess memory.
Phase/Cost Type Update - Adds Phase and Cost Type fields to the ticketing screen.
Allow Expired License/Insurance - Turn off to prevent ticketing a truck if their License or Insurance is expired and needs to be updated.
Print Ticket - (must be on to print) Turn on if you are using a mobile printer.
Note: Mobile printing is only supported with Air Print enabled printers for iPhone.
Advanced Printing - Turn this on to configure your mobile printer to automatically print a ticket.
Printer Type - Set the brand of printer you are using: Zebra, Star Micronics, or Rongta
Search for Bluetooth Printer - Use the blue button to search for your Bluetooth printer and save it in the app settings
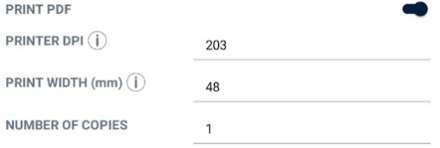
Print PDF - Turn this on to configure the size of the printed ticket.
Printer DPI - Set the dots-per-inch for the printer.
Print Width - Set the width of the printing area.
Note: Click on the "i" icon to see suggested defaults by printer type.
Number of Copies - This sets the default number of copies of the ticket to print
Ticket Mode - Set to Create for creating new Fast-Weigh tickets from scratch. Set to Receive for recording tickets from outside sources.
Turn Around Time - This sets a limit on how quickly tickets can be created in succession.
Calculate Truck Time - Turn on to calculate how many hours a truck has hauled on an order if a product uses the Hours Unit of Measure (based on first and last load times).
Use Requests - Enable this setting to tie a ticket to a Request.
When you open the app for the first time, you will be prompted to select Ticket mode, POD mode, or Haul mode. For Dispatching, select Haul mode.
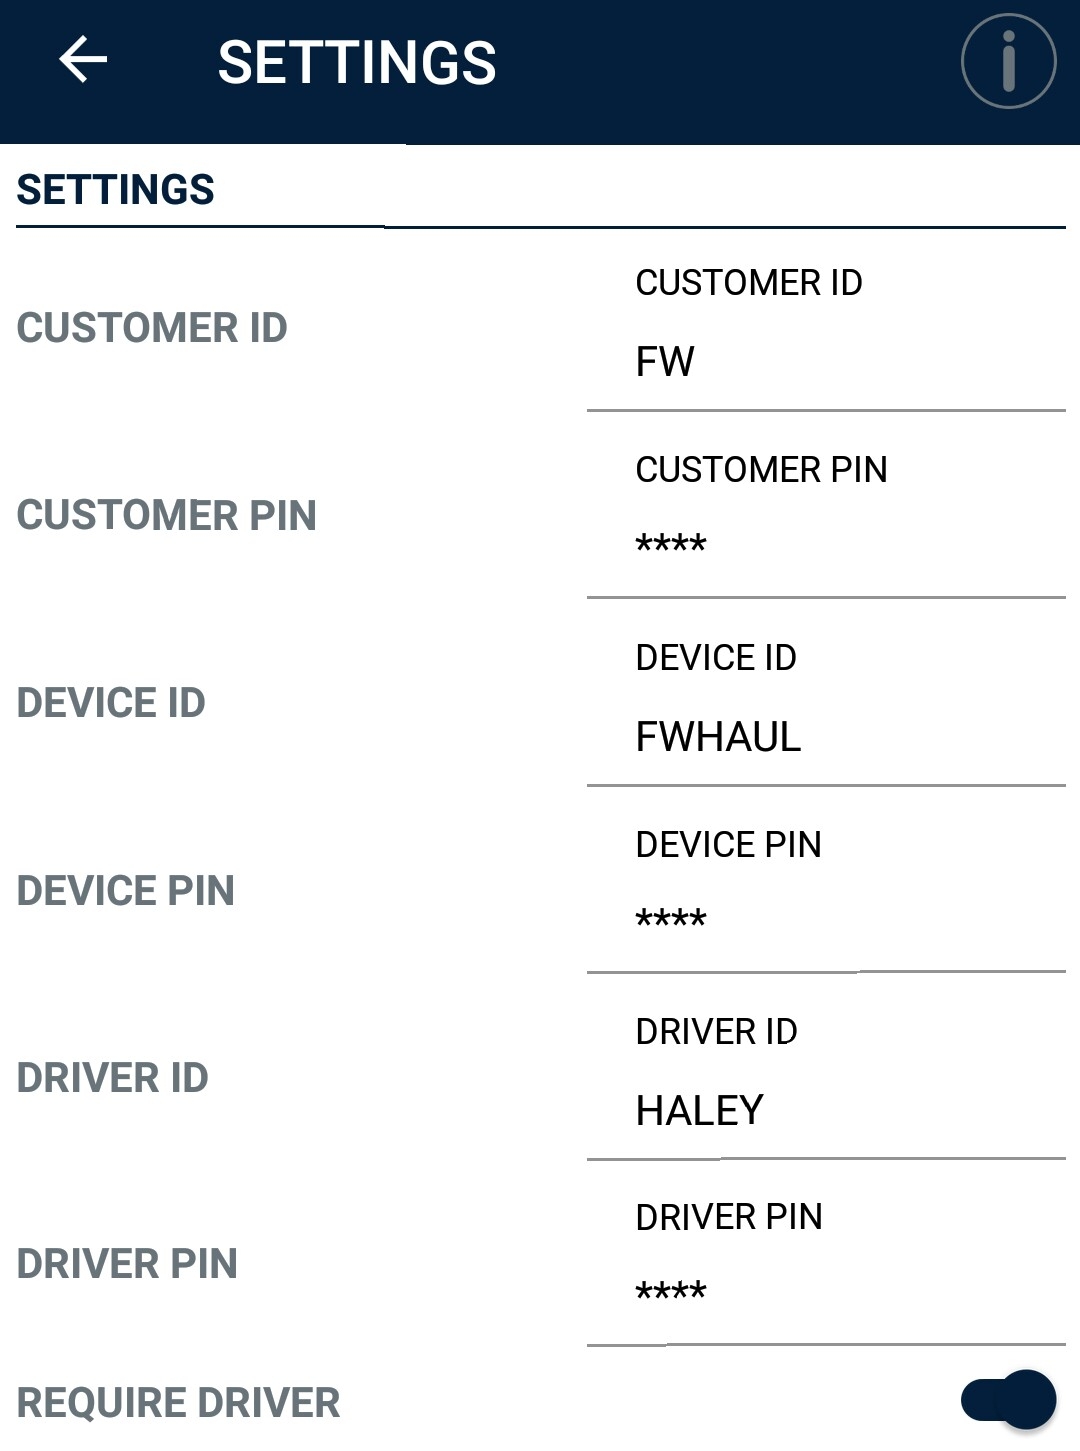
Customer ID and Customer PIN - To get your Customer ID and PIN, contact us at support@tacinsight.com or call 865-219-2980 during business hours.
Device ID and PIN - These can be found on the Web Portal by going to Devices > Truck.
Driver ID and Pin - These are set up under Dispatching > Drivers and you must turn on Require Driver to set up a Driver.
Operator Name - The name of the driver operating the app if you have Require Driver turned off
Click on the back arrow to go to the main Dispatching screen.
Sync the app to ensure all of your Settings have been entered correctly.
Click on the settings button at the top right to finish configuring the app.
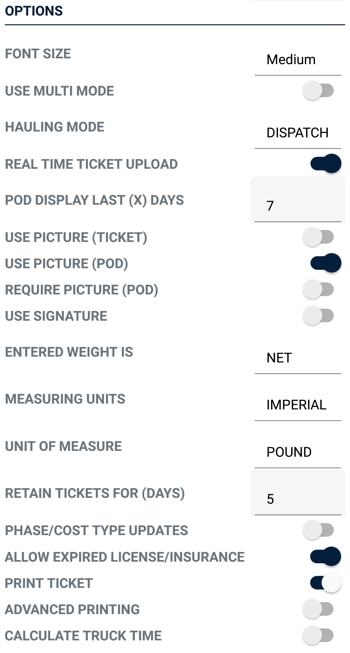
Font Size - You can set a smaller or larger font size for the app here.
Use Multi-Mode - Allows the user to switch between the Ticket, POD, and Dispatching modes.
Hauling Mode - Set to Dispatching for the standard Hauling mode or POD to quickly switch to Proof of Delivery mode.
Some dispatching ticket types have the option to require Proof of Delivery.
Hauling Mode POD will only show dispatching tickets with the same Truck Device ID that require Proof of Delivery, not the entire POD list.
Real-Time Ticket Upload - Enable to upload all new Fast-Weigh tickets to the Web Portal as they are created/received.
POD Display Last (X) Days - Determines how far back the system looks for tickets that can be marked as delivered with POD.
Use Picture (Ticket) - Enable to allow image capture when creating or receiving a ticket.
Use Picture (POD) - Enable to allow image capture when creating a Proof of Delivery.
Use Signature - Turn on to use a digital signature when creating or receiving a ticket.
Entered Weight Is - Choose between a Net weight or Gross weight.
Measuring Units - Set your preferred type of measure.
Unit of Measure - Set the unit used.
Retain Ticket for (Days) - Choose how long the system locally saves ticket data.
We recommend not exceeding 7 days since more data can impact the speed of the system by using excess memory.
Phase/Cost Type Update - Adds Phase and Cost Type fields to the ticketing screen.
Allow Expired License/Insurance - Turn off to prevent ticketing if a truck's License or Insurance is expired and needs to be updated.
Print Ticket - (must be on to print) Turn on if you are using a mobile printer.
Note: Mobile printing is not yet supported by Apple, so this setting will only be available for Android.
Advanced Printing - Turn this on to configure your mobile printer to automatically print a ticket.
Printer Type - Set the brand of printer you are using: Zebra, Star Micronics, or Rongta.
Search for Bluetooth Printer - Use the blue button to search for your Bluetooth printer and save it in the app settings.
Print PDF - Turn this on to configure the size of the printed ticket.
Printer DPI - Set the dots-per-inch for the printer.
Print Width - Set the width of the printing area.
Note: Click on the "i" icon to see suggested defaults by printer type.
Number of Copies - This sets the default number of copies of the ticket to print.
Open the dispatching mobile app and tap the Settings button on the top right corner of the app.
You will see a Device ID and PIN, and a Driver ID and PIN at the top of the setting screen.
This is how your devices are assigned: the Device corresponds to the Truck and the Driver corresponds to the Driver.
Ignore the Customer ID and PIN -- those should remain the same for your entire system. If you do not have a Customer ID and PIN set, please contact support for setup assistance.
You need to first set up the Truck's Device ID and Pin before you can use mobile dispatching.
On the Web Portal, go to the settings gear icon at the top right.
Click Devices.
NOTE: You need an admin login to access this.
Go to the Truck tab on the Device Table.
Add a new truck device ID/PIN by clicking + New Truck Device.
The number of Truck Devices you can set up will be limited to the number of licenses you have on your subscription. If you would like to add a new license, please contact us.
Fill in the Device ID: This is custom, but we recommend using a system like the Truck ID.
Fill in the Device Pin: This is custom, but we recommend using a system like the Truck number.
Set the appropriate Region, Hauler, and Truck ID from the dropdown menus.
Click Update.
You will need to establish Driver IDs and PINs for your drivers before you can assign them to a device.
Go to the Web Portal and login.
Go to Dispatching > Drivers
Check to be sure the driver profile you want isn't already there. If you need to make one, click + New Driver.
Choose the Hauler.
Fill in the Driver ID: This is custom, but we recommend using a system like the Driver's last name.
Fill in the Driver PIN: This is custom, but we recommend using a system like the Driver's Truck Number or the last 4 of their phone number.
Click Update.
Once you have set up Device ID/Pin and Driver ID/Pin for all of your drivers, you can input these into the app settings to assign your devices to your Trucks and Drivers.
Fast-Weigh Mobile Dispatching is an optional feature add-on. To add Mobile Dispatching to your Fast-Weigh subscription, contact us today at 865-219-2980 or support@tacinsight.com.

To add Mobile Ticketing to your Fast-Weigh subscription, contact us at 865-219-2980 or support@tacinsight.com
FastWeigh Mobile Ticketing is an optional feature add-on. To add Mobile Ticketing to your FastWeigh subscription, contact us today at 865-219-2980 or support@tacinsight.com.
The Fast Weigh Mobile app has multiple functions that can be used to streamline and optimize operations in the field. We offer mobile Ticketing, Proof-of-Delivery, and Dispatching available on your smart device.
Find the app on the Google Play Store or iPhone App Store.
Search for "Fast Weigh Mobile."
Install the app.
In order to update your Fast-Weigh Mobile App to a beta version, you will need to contact Support first to determine if the update is necessary and to get the download link.
Once you access the beta download page, you will select the Fast Weigh Mobile app from the download list.
Then, you will select your mobile operating system to begin the download of the newest beta app version.
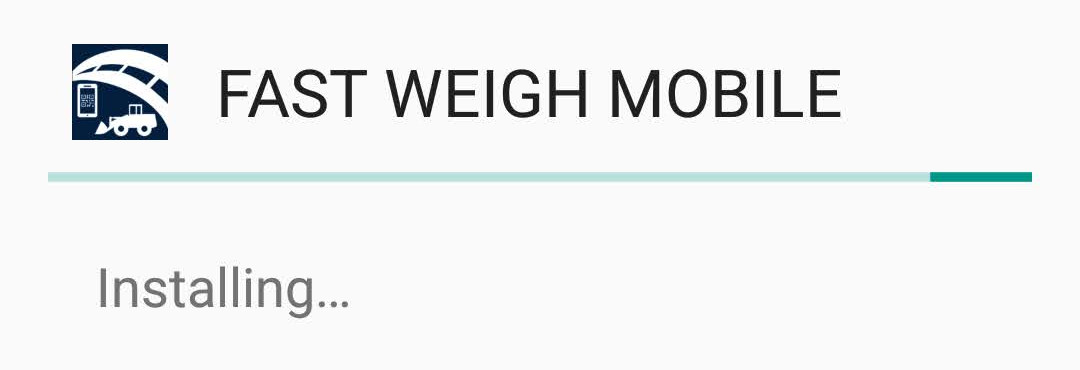
Once the download is complete, tap the file from your notifications or downloads list to begin the update.
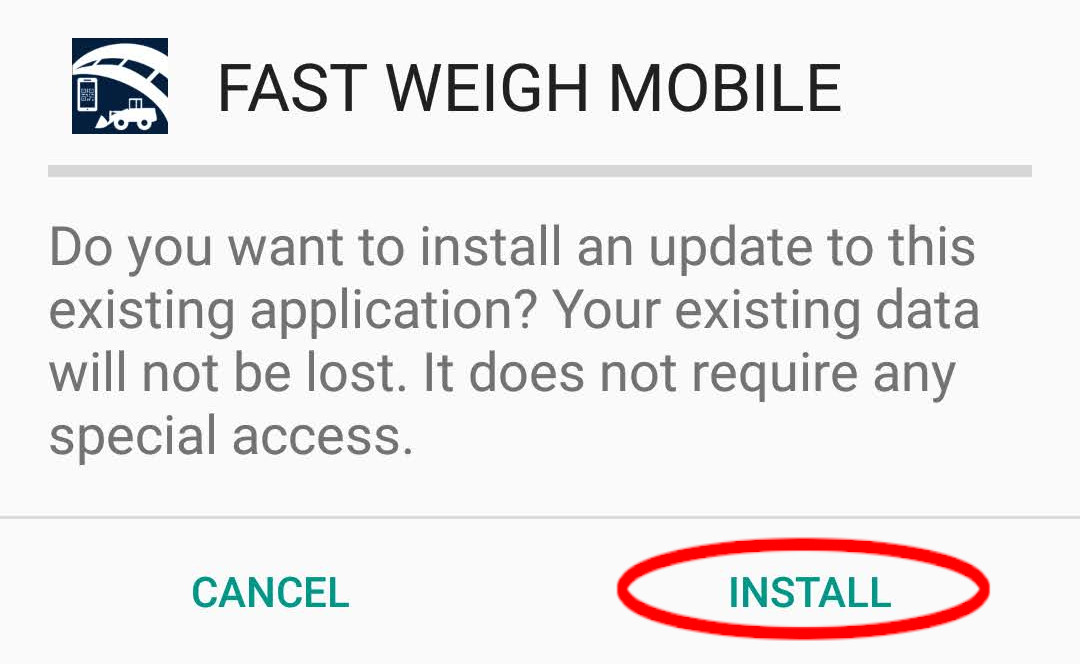
Click Install to begin the update.
Note: This will simply update your app to a newer version, and should not delete any data or settings, but it is always a good idea to make sure you app is synced before performing any updates.
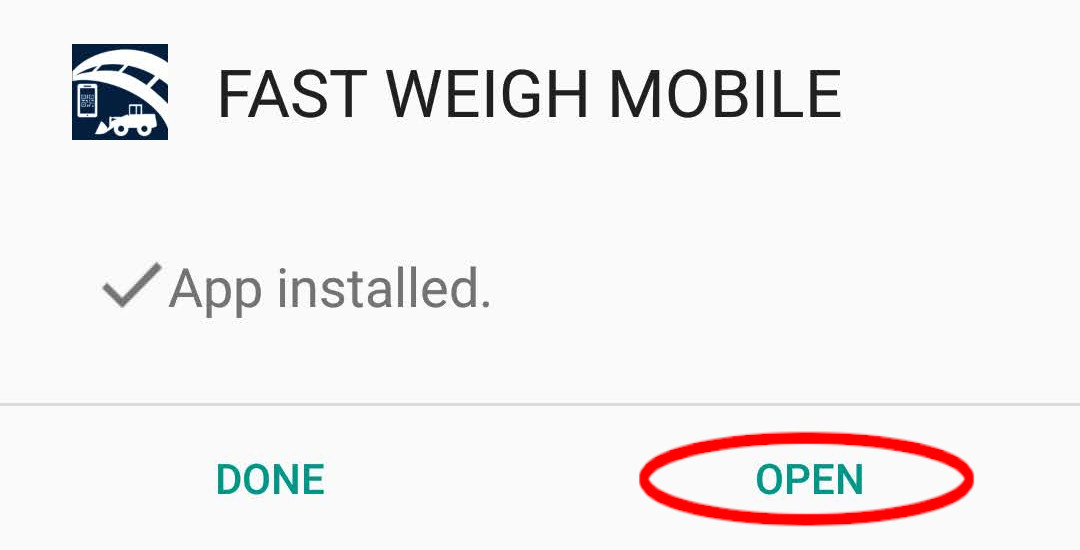
Once the app has finished installing the update, you can tap the Open button to open the app running the new version.
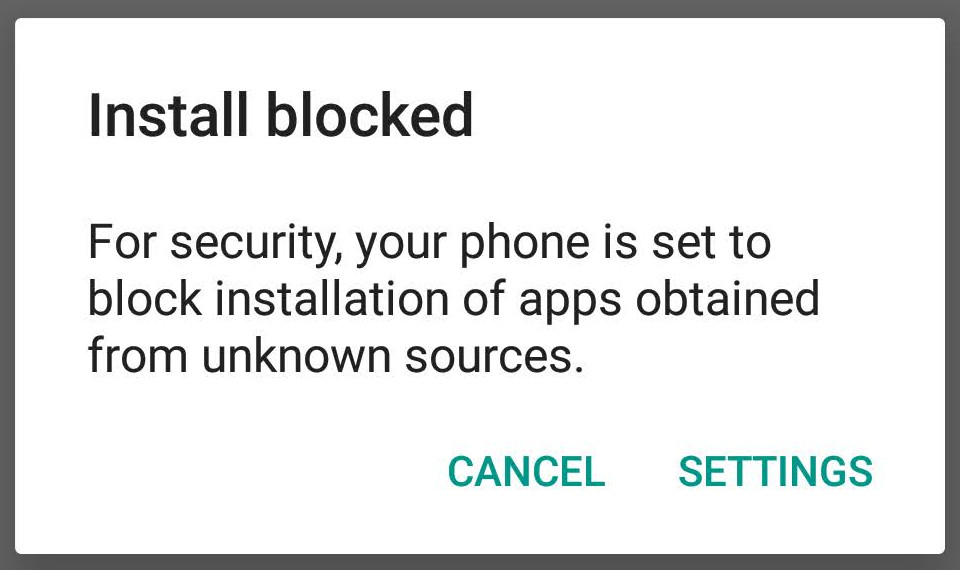
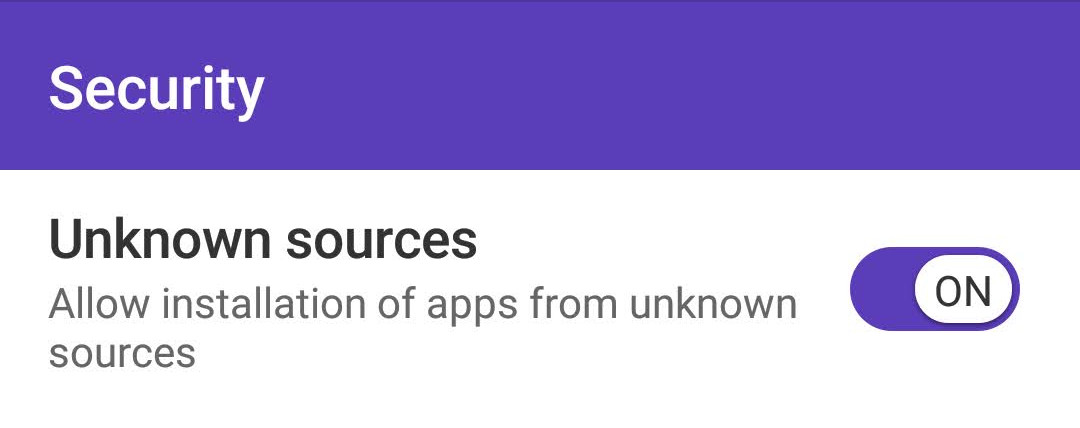
If you have never sideloaded an app onto your device before, the install may be blocked by a security setting.
You can fix this by going into your Settings > Security and setting Allow installation of apps from unknown sources to ON.


To add Mobile Ticketing or Dispatching to your Fast-Weigh subscription, contact us at 865-219-2980 or support@tacinsight.com
The Fast Weigh Mobile app has multiple functions that can be used to streamline and optimize operations in the field. We offer both Mobile Ticketing and Dispatching for any iOS or Android mobile device. If you are printing tickets in the field with the Fast-Weigh Mobile Ticketing App, there are a few different printers you can use depending on your mobile's operating system.
Android devices support a wider variety of printers than Apple devices, but there are a few that we specifically recommend for mobile printing. If you do opt for a printer that is not in this list, you will need to follow the manufacturer's instructions to connect the printer to the Android device itself before printing in the Fast-Weigh app (Note: This usually requires downloading the manufacturer's printer utility from the Google Play Store first).
We recommend the Star Micronics SM-L300 and the Zebra ZQ520.
There are a few steps you will need to take to setup your printer before ticketing.
Here is a link to the printer documentation from Star if you have any questions about the printer itself: Star Micronics SM-L300 Manual
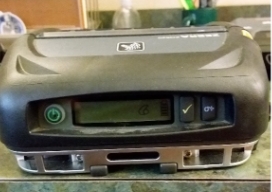
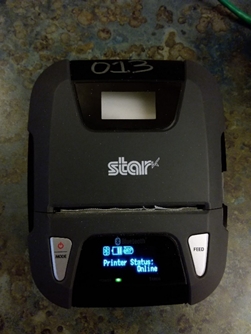
Turn on the printer by holding the power button until it powers on (There should be an audio cue).
Ensure that Bluetooth is turned on in the printer settings (This should be the default).
Ensure that Printer Status is online on the printer screen
Ensure that the printer is adequately charged, as indicated by the battery icon above printer status on the screen.
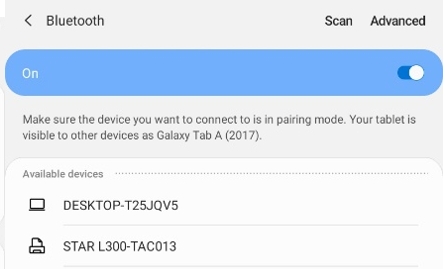
On your Android Device, go to Settings > Connections > Bluetooth.
Note: This may vary depending on your Device.
Ensure that Bluetooth is turned on.
On the Bluetooth page, find and select your printer’s name.
It will look something along the lines of "STAR L300".
Enter the password, if prompted, to pair.
The default Bluetooth password is 1234.
Once paired, the printer will show up under "Paired Devices".
Next, navigate to your Fast Weigh Mobile app.
Make sure that you have printing enabled in the app settings for Mobile Ticketing or Mobile Dispatching.
Turn on Advanced Printing in the app settings.
Select Printer Type, then tap "Star Micronics" in the list of options that appears.
Press the blue box directly underneath Printer Type and look for your printer under Devices.
Note: It should look something like BT:STAR L300 34:81:F4:2D:93:90
Tap your printer so that it is highlighted orange, then press the save icon in the top right.
OPTIONAL: Turn on Print PDF if you would like to print digital signatures, adjust your printer DPI, printer width, or Number of copies to print.
Go through the steps to create your Ticket through Mobile Ticketing or Mobile Dispatching.
Once you finish and tap "Create Load Ticket," the Ticket will automatically print.
There are a few steps you will need to take to set up your printer before ticketing.
Here is a link to the documentation from Zebra about the printer if you have any questions about the printer itself: ZQ520 Mobile Printer Support
Download the "Zebra Setup Utilities Printer Setup Utilities Support" from the Mobile Printer Support page on your PC.
Follow the on-screen instructions for connecting your printer to the Setup Utility via USB.
Configure the printer for Bluetooth connections following these steps: Configure Bluetooth Through the Setup Utility
The printer should restart after the last step of sending the settings to the printer.
On your Android Device, go to Settings > Connections > Bluetooth.
Note: This may vary depending on your Device.
Ensure that Bluetooth is turned on.
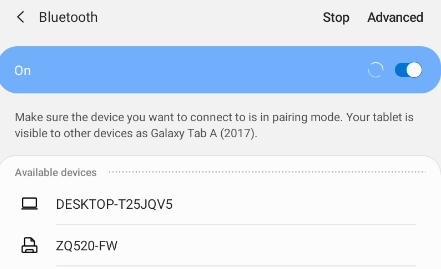
On the Bluetooth page, find and select your printer’s name.
It will look something like"ZQ520".
Tap the printer name under "Available Devices" to begin pairing.
Press "OK" when prompted on the Android Device.
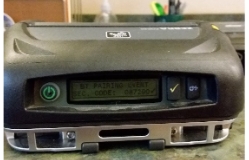
Next, press the checkbox button on the printer itself to accept the Bluetooth pairing request.
Once paired, the printer will show up under "Paired Devices".
Next, navigate to your Fast Weigh Mobile app.
Make sure that you have printing enabled in the app settings for Mobile Ticketing or Mobile Dispatching.
Turn on Advanced Printing in the app settings.
Select Printer Type, then tap "Zebra" in the list of options that appears.
Press the blue box directly underneath Printer Type and look for your printer under Devices.
Note: It should look something like ZQ520-FW CC:78:AB:3378:56
Tap your printer so that it is highlighted orange, then press the save icon in the top right.
OPTIONAL: Turn on Print PDF if you would like to print digital signatures, adjust your printer DPI, printer width, or Number of copies to print.
Go through the steps to create your Ticket through Mobile Ticketing or Mobile Dispatching.
Once you finish and tap "Create Load Ticket," and the Ticket will automatically print.
iPhones currently only support printing through "AirPrint," which allows printing without additional software of drivers needed for your mobile device. AirPrint uses a Wi-Fi connection either by printing over your Wi-Fi network or with a "Wi-Fi Direct" connection to your device.
We recommend the Brother RJ-3050AI For a list of AirPrint compatible printers, check here: Apple - AirPrint Supported Printers
Additional information from Apple about using AirPrint
There are a few steps you will need to take before ticketing to setup your printer. Here is a link to the documentation from Brother about the printer if you have any questions about the printer itself: Brother RJ-3050AI Manuals
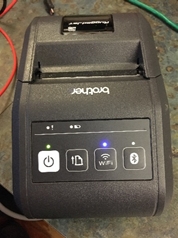
Plug the printer into a power source with the provided power cable. Hold the power button on the printer until the light above glows green. Once the printer powers on, the light above the Wi-Fi button should be blue. If it is not, then hold the Wi-Fi button down until the light above glows blue. On your Apple device, go into the Settings App > Wi-Fi. Ensure that Wi-Fi is turned on.
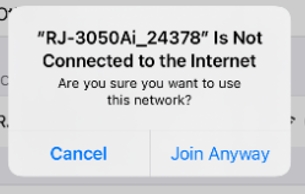
Scroll down to DEVICES, and select your printer.It will be called something along the lines of RJ-3050Ai_24378Note: After the first successful connection, the printer will be located under MY NETWORKS.
You may get a pop-up letting you know that the Printer is not connected to the internet. That is okay, select Join Anyway.
The printer is now connected! Note: Make sure not to disconnect from the printer "Wi-Fi" connection.
Next, navigate to your Fast Weigh Mobile app.
Make sure that you have printing enabled in the app settings for Mobile Ticketing or Mobile Dispatching.
Go through the steps to create your Ticket through Mobile Ticketing or Mobile Dispatching.
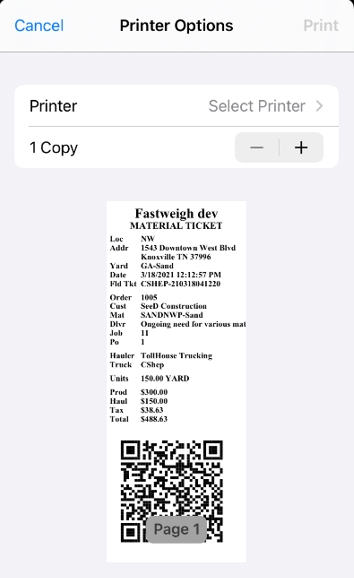
Once you finish and tap "Create Load Ticket," you will be directed to the printing screen.
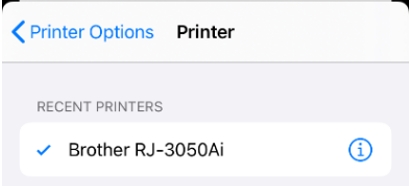
Select the Brother Printer by tapping "Select Printer" and choosing it from the list.
Note: If the printer does not show up, go back into your Settings app > Wi-Fi and ensure that your device is still connected to the printer network.
If the printer is connected and you are still not seeing it as an option, try turning off your Wi-Fi entirely and then turning it back on (make sure the printer is re-connected).
Adjust the number of copies of the ticket to print, and then tap "Print" on the top right of the screen.
If you are having trouble connecting to your new printer, contact us at 865-219-2980 or support@tacinsight.com and we can help out!
